

How To Instantly Improve Shooting In Natural Light
I know what it’s like to be in the kind of situations where it is raining all day long and the sky is ultra-dark even when the sun is at its highest. I understand how hard it can be to get beautiful looking shots when you’re in an open field with no way to control harsh mid-afternoon sunlight. I’ve shot in pretty much all weather conditions at any given time of day, trust me when I say that while it can be tough, you can get great images no matter what kind of natural light you’re working with.
“Wow Sam, an article on how to use sunlight to get nice images? How original.”
I know, it may sound like I’m scraping the bottom of the barrel for ideas here, but please give me a chance! Figuring out how to make the most of shooting in natural light is a key part of learning to become a successful photographer or videographer. But I want to take it a step further than other posts you’ve read on this and tell you how to make the most of natural light in any weather situation, at any time of day.
Yes, that’s right! I want to actually tell you more than simply just ‘shoot at golden hour’ or ‘wait for the light to be right before shooting’. We don’t always have the time to hang around all day for a break in the clouds or maybe your shoot doesn’t work at sunrise or sunset.
I know what it’s like to be in the kind of situations where it is raining all day long and the sky is ultra-dark even when the sun is at its highest. I understand how hard it can be to get beautiful looking shots when you’re in an open field with no way to control harsh mid-afternoon sunlight. I’ve shot in pretty much all weather conditions at any given time of day, trust me when I say that while it can be tough, you can get great images no matter what kind of natural light you’re working with.
So where do we start?
Control The Natural Light
Right now you’re probably thinking ‘But how am I meant to control the sun?’, and I can completely understand why you might think it’s impossible, I used to think the same.
But what you actually want to do is take a look at wherever you’re shooting, whether it’s indoors or outdoors, and observe where the light is coming from, the surfaces it’s hitting, what it’s possibly reflecting from, and any pockets of light and shadow that are being created.
It’s a lot to try and ‘read’ from your scene all at once, but it’s an important skill to learn. Having this skill allows you to decide on the spot where is best to place your subject and what angle you want to film from.
Being able to make these decisions quickly effectively then frees you up to begin figuring out what light you can begin subtracting from your image to get a good balance of contrast and shape in your shot.

For example, if you are shooting outdoors in a busy urban area just after midday you can bring your subject into the shadow of a building to give more even light across their face. Alternatively, you could position them with a large wall or window off to the side to bounce light across their face to add shape to the image.
On dull days with grey skies, you may find it more difficult to add contrast to your image as the clouds essentially act as one huge softbox throwing even lighting everywhere. Instances like this are very tricky to deal with (even though they’re really common here in the UK and Ireland) but you can mitigate it and add contrast back into your scene by moving your subject to the edge of soft shadows being cast by trees or overhangs on buildings. You can also use this as a time to experiment with finding areas of good colour contrast to help make your image more dynamic.
Making the most of natural light while shooting indoors is in some ways more limiting but it can be easier too, as windows become your source of light.
Window light is fantastic as when positioned to the back or side of your camera, it acts as a great key light for your subject. The light roll-off in-camera can look fantastic too, allowing you to get amazing looking shots, with great contrast across the image, using fairly little effort. The drawback is that, unless you can rotate the building you’re in, you are stuck with whatever position the windows are in. In cases where your room design isn’t great this can feel like a really limiting factor.

If you are struggling to get the right balance in your image by trying to rely on your surroundings then it’s time to figure out how you can begin shaping the available light. In cases like this, you will either need some extra helping hands or additional time before your shoot to set up everything you need to shape your light.
Using a 5-in-1 reflector to diffuse, add, or take away light from your shot is a great way to shape your light if you are on a run and gun kind of shoot. I try to avoid using the silver and gold sides of the reflector if I can help it as the light that bounces back from them can look artificial. I prefer using the white side to reflect light, and the black side to act as a negative fill to add more shape and contrast to my subject. Ideally, the bigger your reflector is the better, having a larger surface makes it easier to catch the light to bounce back and it also means you have a larger source of diffused light if you remove the outer layer.
Aside from using reflectors, you can shape natural light how you would with artificial lights, by using flags and scrims to block, bounce and diffuse the light. Depending on the amount of light and time you have available this is a fantastic way to make your image look really professional.
Choose appropriate locations for the time of day
This may sound obvious, but if you are working on a shoot with only daylight, you should structure the production around what locations will look best at a particular time.
For this to be pulled off flawlessly, you absolutely have to put in the effort in your pre-production to make sure you not only know what each location looks like at what time but also to have backup locations in case your weather and lighting weren’t what you had originally planned.
There’s no point in showing up to a location at the wrong time with the wrong weather and shooting sub-par shots unless you have no other choice. If you can, take the time to do a recce and actually see how each location looks. Keep an eye on weather forecasts and use your best judgement on how a particular spot will look in the lighting conditions you want.
It’s not always possible to plan for every eventuality, but knowing where else you can go and how to deal with poor light could very well save your shoot.
Work With The Weather
Following on from the previous tip, we can’t always expect sunshine and work with beautiful golden light from sunrise and sunset (unless you live in California apparently) so you will have to do your best to work with whatever weather conditions are available.
Despite your best efforts, you can’t always get the same weather and lighting conditions that you had during recce’s and you may be unable to postpone or reschedule a shoot. It will be times like this that you have to roll with whatever nature throws at you.
Here in the UK and Ireland we almost always have some form of full or partial cloud cover that can change the available light very quickly, which can make getting consistently lit images a pain. Thankfully, it does mean that we are very well equipped for understanding how cloudy days affect the light that we have to work with.
On very heavily clouded days it is like working with a gigantic soft light source, which can be great for portrait shots that give beautiful even light on a subject's face. The drawback is that there is very little contrast in the image, meaning we have to either bounce light back or use negative fill to remove the light from the scene to add more depth to the image.

If you live somewhere with constantly changing weather conditions then I highly recommend installing a weather app that can give you highly detailed readings of the ebb and flow of cloud cover. I have one installed on my phone that breaks down the weather into 5 minute chunks, showing me (with really good accuracy!) when we will have a break in rain and clouds. Having this information is crucial to being able to rearrange a shoot schedule and improvise other shots while you wait for a window of opportunity for the lighting conditions you actually want.
In the cases where you know there is zero possibility of your ideal lighting conditions appearing, then you will have to carry on the shoot regardless. Do your best to shape the light you have and try to reframe shots. Don’t be afraid to deviate from a shot list if it helps light your subject better and adds more to the depth in your image.
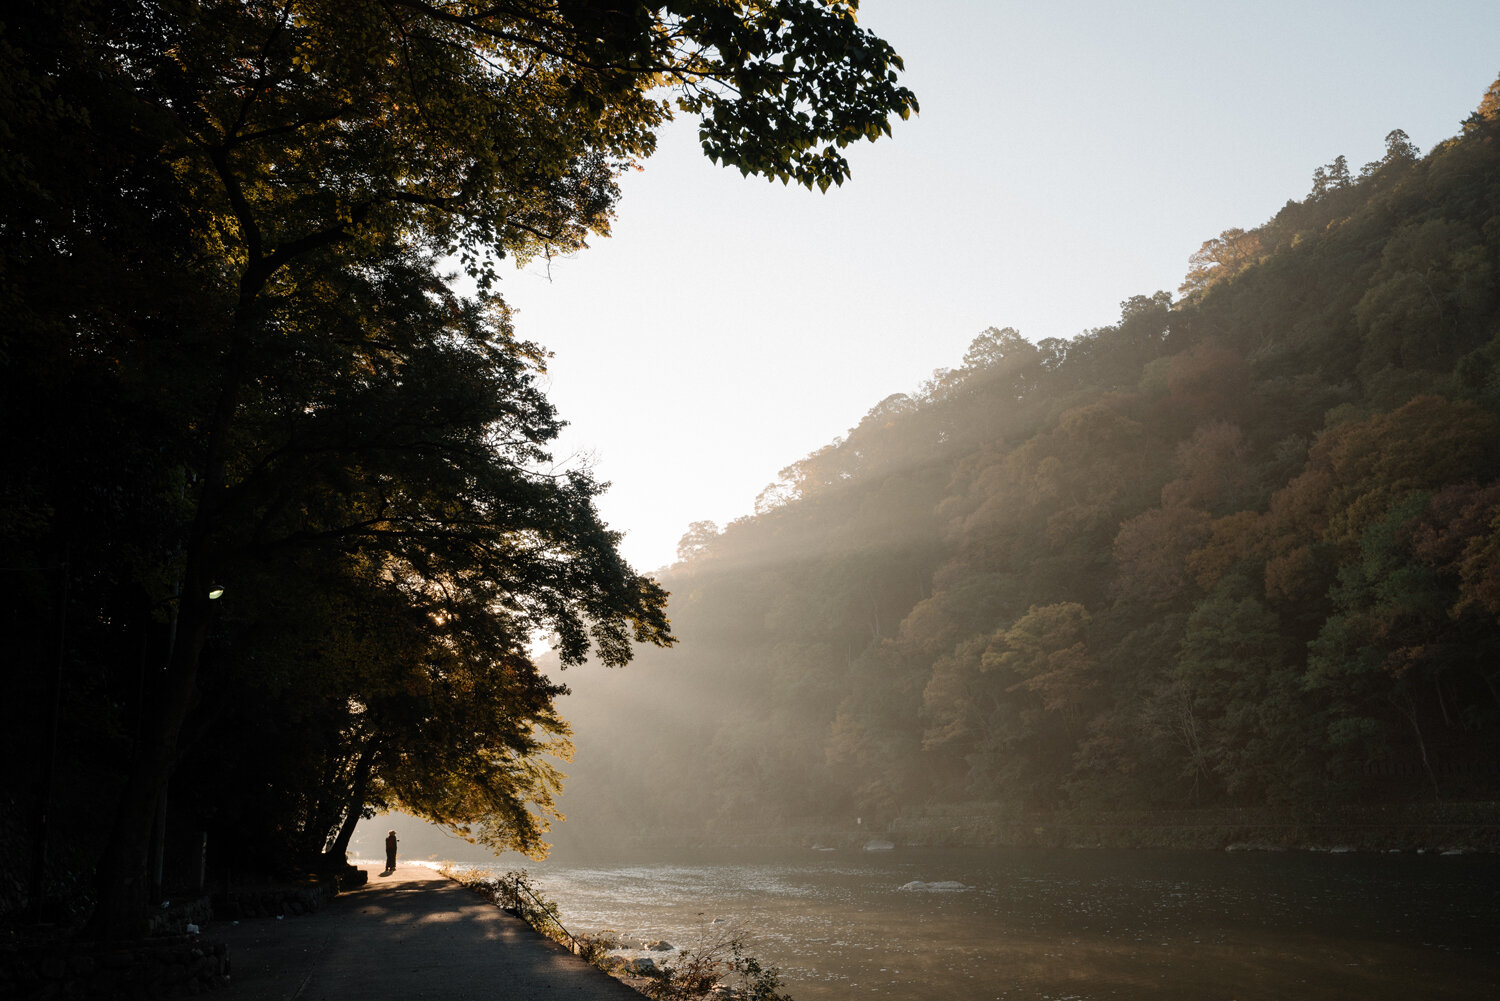
Backlighting and side lighting
Backlighting, backlighting, backlighting. This is the secret to how Hollywood productions look the way that they do. Once you know the formula you will see it in almost everything you watch.
Placing your main source of light, whether it’s natural or artificial, behind or to the back and side of your subject casts shadows towards the camera, adding shape, texture and helps add to the film-like feel of a shot.
This is especially useful when shooting in natural light because it not only adds shape to your subject, but also helps add contrast to your image, allowing your viewer's eye to pick out the areas of the image that are the most important.
But the benefits of backlighting your subject don’t end there! If your subject is a person, placing the key light behind them allows them to face the camera without being blinded by bright sunlight. This is particularly useful if they are delivering a line to the camera, or lined up for a group photo.
Positioning yourself so that the sun acts as a backlight also allows you to quite easily bounce light back towards your subject while still giving them a rim or hair light to separate them from the background. Using this effectively can completely transform the look and feel of your image, taking it from a good shot to a great shot.

Taking this a step further, when you begin to add and subtract light using bounce light and flags to shape the light, you will want to try to create a series of dark and light zones in your image.
The human eye is naturally drawn to looking in places of high contrast first, doubly so if there is a face to look at, so crafting and shaping the light in your image to go dark-light-dark-light-dark frames your subject and draws your viewer’s attention to what is the most important in your image.


Boring Things Every Filmmaker Needs
Filmmaking is so exciting! At least it is until it isn’t… Not every aspect of being in the creative industry is as glamorous and sparkly as it may seem to people from the outside looking in. That’s why today I think it’s high time we talked about all of the absolutely essential, but incredibly boring, things literally every filmmaker will need across their career.
Filmmaking is so exciting! At least it is until it isn’t… Not every aspect of being in the creative industry is as glamorous and sparkly as it may seem to people from the outside looking in. That’s why today I think it’s high time we talked about all of the absolutely essential, but incredibly boring, things literally every filmmaker will need across their career.
Boring But Important Things Every Filmmaker Needs
Data Storage
Let’s start with possibly the single least sexy and unglamorous aspect of filmmaking. Yes, that’s right, data storage. Without having a single SD card or hard drive to work from you wouldn’t be able to get a single thing done, ever!!
Nobody gets excited when talking about this but it really is one of the foundational building blocks on which your filmmaking career will grow.
When it comes to capturing and storing all of your footage you will want to hit a nice balance between good quality and a decent quantity of cards and drives. Your needs will change over time but you will want to make sure you have plenty of space available to store and backup anything you film.
For SD cards try to buy the fastest and best quality cards you can for your camera. For most cameras an SD card from SanDisk or Lexar will work perfectly fine! I highly recommend them as they’re the cards I’ve used for a good portion of my career! Different cameras can read and write at different speeds so just be sure you buy a card that is compatible with your camera.

FAST SD CARD FOR RELIABLE CAPTURE

FASTER SD CARD FOR SUPER FAST WRITE SPEEDS
Now you have plenty of cards, you’re going to need to keep them in one place. Leaving them loose at the bottom of your camera bag will eventually break them. Trust me, I speak from experience…
Thankfully you have super boring card cases to shop for! You don’t have to spend too long on this purchase, something cheap and cheerful like this one will keep everything in one place and more importantly, in one piece.

best SD card case
When you’re sorted out for SD cards, next will come the BIG headache. Storing them for editing and archiving. As a beginner I used to buy super cheap external drives from the local supermarket anytime I needed more space. But it quickly became unmanageable! I ended up with boxes upon boxes of 500GB drives. Once you begin the transition from hobbyist to pro it becomes even more difficult to manage!
For anyone just starting out as a professional filmmaker I would encourage you to pick up the largest hard drive you can afford, like a LaCie Rugged Drive as they are pretty much indestructible (to a point). And once you reach the point where you are consistently working with huge files and have a lot of projects happening at the same time, then you will need to dig deep into your pockets and buy the absolutely monstrous drives that Google makes. It hurts like hell to buy but it is worth every penny when you edit without any interruptions.

fast and reliable hdd

ultra fast 4 bay RAID
To make sure your stored data is extra safe you will also want an additional drive to store a backup of your files, just in case your main drive becomes corrupted or breaks! In fact, I would also recommend uploading all of your footage to a cloud service or an off-site server to be triply sure your files are safe!!
Stands and Stabilisation
Yaaawwnn!! Nobody gets excited over the light stands and tripod you use on set. You aren’t going to message your filmmaking buddies and tell them how much you’re looking forward to buying your next C-Stand. But like everything on this list, they’re just as important to making your film the best it can be.
You will probably end up with more stands than you can count, but it’s still worthwhile buying ones that are sturdy and will last on set. Steer clear of the thin and flimsy light stands that come with most sub £100 3-point lighting kits, they will bend and break the moment you put something heavier than a house lamp on them.
Instead, look for good quality and decently priced stands from the likes of Neewer and Flashpoint. They aren’t as sturdy as more expensive stands for professional use on a set but they are fantastic quality for the price!

best value light stands

Best Value c-Stand

best quality professional c-stand

best quality professional light stand
I will go out on a limb here and say tripods are slightly less boring than light stands, but only by a bit. Realistically as long as your tripod is fluid and sturdy nobody really cares about what it is. That still doesn’t give you an excuse to cheap out on it though!
Your audience won’t know if you’re using a good tripod, but they sure as hell will if you’re using a bad one!!
Unfortunately good tripods aren’t cheap, and what works well for you will depend entirely on how heavy your rig is. You can expect to pay upwards of £300 for a tripod before you are in the territory of finding a ‘good’ one.
Thankfully, Manfrotto tripods are a very solid choice. I have used mine for the better part of 7 years on pretty much every shoot I’ve been to, so I can highly recommend them for people who shoot on mirrorless cameras like I do!

When you begin using larger cameras and rigs you can begin by heading over to dedicated camera stores and creating tripods that suit your needs. Most professional tripods can have the fluid head and tripod legs swapped around and customised to suit your specific needs. Doing this does get pricey pretty quickly but it’s worth it in the long run!
Tools and Storage
Things break all the time, and your camera equipment is no different. The only way to make sure everything stays in tip top condition is to look after it, store it properly and keep up maintenance on it before it becomes irreparable. That’s why you’re going to need tools and cases in all shapes and sizes. It’s not fun or exciting, but it is necessary if you don’t want to have to buy all the other boring kit again!
The tools you need for your film gear should be pretty straightforward. A handful of allen keys, a screwdriver with interchangeable heads and a ratchet with varying socket sizes will carry you through almost all of the basic repairs and bolt tightening you will need to do. Though it’s always worth having some kind of multi-tool with you on a shoot too, just in case any last minute adjustments need to be made.
The thing I find myself having to do more than anything else is tightening up the tripod plate on my camera. It always loosens over time, so you should be prepared for it in advance!

best value tool set

best value allen wrench set

Best value multi tool
For the equipment you want to keep in the best condition possible, you will need a hard durable case to keep it in. The less knocks your gear takes, the longer it lasts.
Good cases aren’t cheap but they will take a beating before they break. When it comes to choosing a durable case you will almost always hear people talking about Pelican Cases, and for good reason. For years they have set the industry standard on keeping any type of camera gear you can imagine safe. They’ve built their reputation on the quality of their cases and that’s why they command such a high price.
Don’t worry though, there are plenty of other case manufacturers out there whose cases also do a fantastic job of keeping your kit protected. You may need to take some extra time to sift through the good from the bad though!

best quality hard case

best value hard case
Music Licensing
You can’t make films without good music. Well, actually you can, but a good score will help strengthen your narrative and help drive the story forward! Unfortunately for you, good music doesn’t grow on trees. So if you’re not a musician then you will probably have to license music like the rest of us!
Thankfully there is no shortage of talented musicians on music licensing websites like Musicbed and Artlist. I take out a yearly subscription on both of these sites and they cover me for every type of project I work on!


This is entirely anecdotal but I have found that Artlist tends to lean more towards music that works well for YouTubers, product videos, social media content and anything that needs a bit of pep and punch to it. Whereas Musicbed has music that works perfectly for longer form content like documentaries, cinematic short films and work that needs an extra level of finesse and polish.
Of course that’s not to say that you can’t find exciting and punchy music on Musicbed, or mature orchestral scores on Artlist!! But they both know the market they’re serving and the kind of music that their clients want to discover when they search on there, so both sites have a distinctly different feel of music to them. One isn’t better than the other, it just depends on the project you’re working on!

The ultimate guide to becoming a wedding videographer in 2021
Breaking into the wedding industry as a filmmaker or photographer isn’t too difficult. In fact, all you really need are a handful of good weddings under your belt that you can advertise and showcase to future couples! You can learn and develop your skills as you grow, however, you have to absolutely LOVE what you do if you’re going to last in this industry.
The days are long, you will have a lot of admin to do and you absolutely can’t afford to mess up. There are no retakes on a wedding day. If you miss capturing a special moment then it’s gone forever.
If there is one field of expertise in filmmaking that I know more about than any other, it’s creating wedding films. Almost from the moment I graduated university I found myself thrown into the deep end of the wedding industry, completely out of my depth. It was hard work, terrifying, and very fast paced, but most importantly it taught me more about filmmaking in one month than three years of higher education did.
It taught me how to react to moments before they happen so I captured them perfectly, I learned to nail exposure every time in any lighting, I developed my own sense of editing style and even more crucially I learned so much about operating and running a business.
Breaking into the wedding industry as a filmmaker or photographer isn’t too difficult. In fact, all you really need are a handful of good weddings under your belt that you can advertise and showcase to future couples! You can learn and develop your skills as you grow, however, you have to absolutely LOVE what you do if you’re going to last in this industry.
The days are long, you will have a lot of admin to do and you absolutely can’t afford to mess up. There are no retakes on a wedding day. If you miss capturing a special moment then it’s gone forever.
If you haven’t been scared off by that yet and are still feeling excited by the prospect of getting the chance to become a part of a couple’s special day and keeping the memories of it alive for years to come then continue reading! I will teach you everything I know so you can get stuck right into it!!

HOW TO START A WEDDING VIDEOGRAPHY BUSINESS IN 2021
Branding
First things first. Let’s talk branding. This is one of the first things you need to consider when starting your wedding videography business. You need to have a really good sense of who you are, how people perceive you and you absolutely need to know the reason why you’re becoming a wedding filmmaker.
Couples will be able to immediately tell if you’re pretending to be someone you’re not. Being honest and real with your couples and your branding will not only make them trust you more but will also help push away the couples who aren’t the right fit for your business and personality.
So how do you create a brand that represents you?
There is no one-size-fits-all answer for this but these are the steps I took when I created my wedding film business.
Figure out a brand name
Create a logo and basic colour scheme
Build a website
Make social media accounts
One of my biggest concerns, when I was creating my wedding videography business, was what I should name the business. After all, it’s difficult to take the next steps before you know what to call yourself!
When I was setting up my business in 2014 I had seen that a lot of wedding photographers and videographers were either incorporating their name into their business or would create a whole new ‘brand’ with an interesting name to advertise to couples. The way I see it is that there is no right or wrong way to go about it and it will be entirely up to you as to what you choose. For me, I ended up creating a brand as I wanted to keep my wedding work separate from everything else I would create.
I did this because people who come to your website to view your work just quite simply aren’t interested in seeing music videos, travel films or anything else outside of weddings. They want to be able to see exactly what they can expect so that’s what you need to deliver.
After that, I spent an hour or two making my logo and hammering out the colour scheme I liked. This helped keep everything consistent across my website and social media. This aspect of your business isn’t super important as you don’t have to get this right the first time. Every brand and website go through changes as time goes on, so you can continually update this aspect of your branding as you grow.
If you are really struggling with choosing brand colours and creating a logo then you can always ask friends and family who are good at design to help you. Failing that, you can always head to websites like Fiverr to pay someone to create your branding for you!
Once you know what you are calling yourself, go ahead and create all of the social media accounts that you think you might need. I have personally found Instagram to be the best tool when it comes to free advertising for weddings, but you may as well set accounts up for every other app too (even if you don’t plan on using it) to make sure your handle doesn’t get sniped by someone else.
You will also want to make a website to act as the central hub where your wedding films will live. Feel free to use any website builder that you like for this! I personally use Squarespace for both my wedding website and this one. I’ve used them for years now and I genuinely love how easy it is to get started using them.
When it comes to building your website there is so much to learn and take into consideration. You will want to make sure your website is clean, easy to navigate and has clear ‘calls to action’ throughout it.
You can take a look at my wedding film website to get an idea of what I’m talking about, but you essentially want to do your best to take visitors to your website on a journey that ends with them contacting you.
You will see from my website that as soon as you open the homepage you are told what we do, couples looking for wedding films will immediately know they’re in the right place, and there is a button leading to the contact page directly underneath it.
Aside from this, I have also made sure that the banner takes up about 65% of the pages real estate, to show visitors that there is more information underneath which encourages them to scroll down and takes them on the journey of seeing who we are and what we do. All of the content on the website is written in the way I would actually say it out loud. I don’t pretend to be someone I’m not and it comes through in how I write. This is so soooo important in building trust with your clients! If you’re the type of person who is really energetic and hyped about everything then make sure your content reflects that!
Looking at the navigation bar at the top of the page you can also see that it’s laid out in order of what is most important to visitors to the site. Most couples want to see our work first before learning more about us so that is why our films and photography take precedence over the about page.
It is overwhelming in the beginning to figure out the journey you want to take your visitors on, especially if you don’t have much work to showcase, but it is definitely worth keeping in mind that an important part of your branding will come from how friendly your website is to the people viewing it.
Now you have your website and social media accounts created you need to fill everything up with content.
For this, I would highly recommend asking around all of your friends, family and anyone else you can think of to find out if they know of anyone who is getting married that would be happy for you to come along and film their day.
You could also reach out to already established wedding videographers who you admire and ask to shoot alongside and assist them for free, as long as they allow you to keep a copy of your footage to use for your own edits.
If you’re really stuck you could run a competition for a free wedding shoot or spend money on ads, but I would avoid doing this until you’ve shot some weddings as it’s hard to advertise when the imagery you use isn’t your own.
Getting these first few weddings may be tough but it will be worth it when you are able to then begin drawing in your first paying clients!
EQUIPMENT
Talking about equipment for weddings takes a long time. It’s a very involved process as you want to make sure you are carrying almost all of your kit on you for the majority of the day, while still being light and inconspicuous enough to allow you to freely move and blend in.
As it happens, I have already written extensively about the equipment I use and how I use it on a wedding day. So if you are stuck on where to start with what you will need for your own wedding film business then I highly suggest you go read it!
I cover all of the cameras, lenses, audio gear, tripods and even bags that I use and why I use them the way that I do. Even if you choose different brands for all of your gear I still think you might find some useful insights as to why I have picked particular equipment over others!
Marketing
Once you have all of your branding and equipment figured out, now comes the hard part. In fact, this is the part I like the least and it’s definitely my weakest point when it comes to being a freelancer and running my business.
That said, when you are beginning your journey as a wedding filmmaker and you don’t have very many wedding films to showcase to potential clients it can be hard to know where to start in order to draw people in. Thankfully you don’t necessarily have to show weddings to couples who want to book you.
When I began marketing my wedding business in 2014 I asked around my friends and family if they wanted some free photos and videos of them and their partners in exchange for me being able to use them on my social media and website. Not everyone said yes but plenty did! It was a great start to be able to have this content to post and get eyeballs on what I was doing. A lot of photographers and videographers will have similar content on their own social media platforms that showcase ‘couple sessions’ or ‘pre-wedding sessions’ as it’s part of the packages they offer. When you’re starting out I would highly recommend doing this as even if you’re only doing it for friends and family you are able to make it look like they have already booked you for a future wedding and you are doing a couple’s session with them!
Another decent avenue for marketing when you are starting out is to take part in wedding fairs. You will need to have some kind of work to be able to show here, as well as flyers with info about you and the packages you offer, but these can be great for connecting with couple’s you wouldn’t have been able to reach before.
The drawback from this form of marketing is that you will have to pay a sometimes sizable chunk of money upfront and you can’t guarantee that you will earn it back, especially if couple’s don’t resonate with your work. That said however, because you are there in person you will be able to bring your personality to the fore and get the chance to chat with couple’s face to face. This immediately builds trust and if you make a great first impression then you are likely to get at least one or two bookings!
My only advice here is to make sure that you do your research on the fair before you sign up. Different fairs attract different kinds of people, with different budgets and styles for their wedding. In order to get the most out of your investment at a wedding fair, you have to make sure you only attend wedding fairs that are likely to attract the kinds of couple’s you would like to work with.
Aside from marketing on social media and attending wedding fairs, you will probably find that the majority of your marketing will come from word of mouth. I cannot stress enough how important this form of marketing is!!
When you get your first wedding clients you have to treat them like they are the most important people in the world. You need to be open and honest with them in all of your emails, calls and in person meetings. Offer to take them out for a coffee to chat with them about how they met, how their engagement happened, what made them realise that they were ‘the one’ for each other. Avoid trying to upsell anything to them and really make an effort to get to know them. Essentially you are trying to build a relationship with them outside of just being a wedding filmmaker.
I’m not suggesting you have to chat to them every day or become best friends but putting in that extra bit of effort to show them that you actually care about them will build up their trust in you. But more importantly than that, you have to live up to and exceed their expectations! This means you need to operate your business by making sure you ‘under promise and over deliver’.
What do I mean by this? Put simply, you have to give your couple extra value for their money.
Rather than saying you will provide them extra edits of their films for social media, or that you will bring along a drone to capture aerials of their venue, you just do it without mentioning it at all. Giving a couple additional films or footage that they weren’t expecting will make them want to recommend you to their friends and family, after all, you just gave them a fantastic experience!!
Additionally, it doesn’t have to end once you have finished editing their wedding. If you set aside an extra 10 minutes when you’re finished editing, you could easily put together a 30-60 second highlight video for your own social media to wish them a happy one year anniversary.
The more effort you put in for your earliest clients, and any after that who you really get along with, will help set you up on the road to success for years to come!
Pricing and package building
When it comes to how much you should charge for your services I’m afraid I can’t give you a hard and fast number. Pricing is an entirely subjective, and occasionally contentious, issue amongst professional wedding photographers and filmmakers. Really only you can decide what feels like a good balance between compensation for the time you put into your work and what the couple receive for their money.
What I am able to tell you though is where you can begin looking to figure out where you sit in the grand scheme of pricing your work.
To start, you need to be completely honest with yourself on your skill level and how good your final product is. Once you know this you can begin by looking for other wedding videographers and photographers who are offering a similar style of product to you.
There are so many different styles of wedding video out there, ranging from high class celebrity weddings with massive budgets who hire in cinema cameras and multiple operators to film everything, right the way to solo shooters who create fast paced edits that immediately grab your attention. It might take time but it’s important you identify what style most matches your own, or at least the style you want to try to emulate.
Once you have found someone offering work in a similar style, check out their website and social media for any indication on what they charge. Some people will have their exact pricing and packages listed out for potential clients to read before they contact them, and others will simply have a ‘Prices begin at X amount’ on their contact page. Either way, it gives you an idea of what others in the industry, and more specifically the niche you are in, are charging for their services.
I should also note that it’s important to only look within your local area or country, as if you begin comparing the prices of weddings within the different countries of the UK there is a big difference between wedding prices in Northern Ireland, where I live, and with England, and more specifically London. So where you live plays an important aspect of your pricing too!
With this information, and by being honest about your skill level, you will be able to get a much clearer picture of where you sit within the industry.
You want to make sure that you aren’t pricing yourself so cheap that you lower the cost for others in your area, but at the same time you don’t want to be charging three times as much as someone who is providing a better service and end quality product.
As you grow and become more experienced at weddings you will be able to increase your pricing relative to the knowledge you have gained and the added value you are able to provide your couple’s. It’s a slow climb but it’s one that is worth it!!
In terms of how best to create packages and show it to people who make enquiries, I would recommend starting with two or three packages that provide increasing levels of value to the couple. For example, your first package could offer a solo shooter for the whole day and the couple receive a 3 minute creative film and a 15 minute film of the whole day, and your third package could include a second shooter with the films increasing in length as well as full edits of the ceremony and speeches, with the second package sitting somewhere between the two.
Having this choice for your couples allows them to decide on what is most important to them as well as giving you the opportunity to earn additional money by providing them extra value.
‘Making It’ As A Wedding Filmmaker
Setting goals for yourself as a wedding filmmaker is a really important step to making sure you grow continually for years to come. It can be quite difficult to measure the success of something that isn’t necessarily tangible though… As I said at the beginning, becoming part of the wedding industry is hard work, you really have to be passionate about your couples and celebrate their love as much as their friends and family. So how exactly do you know that you’ve ‘made it’ as a wedding videographer?
For me, I knew that I had reached that milestone when I was able to talk to one of my couple’s about an idea that I had for their wedding film and they immediately hopped on board and flew me out to San Francisco because they trusted in me and my work so much that they knew I could deliver. Ever since that wedding I now get a handful of weddings each year that bring me out to cover their destination wedding, and that is so exciting for me!
What your success will look like will depend on the goals you set yourself. If you are currently working in a 9-5 job and want to be able to work from home as a wedding videographer then your road to success will likely be that you’ve ‘made it’ when you are able to earn the same as your current salary from creating wedding films.
Whatever your goals are, here are some simple tips I can give you so you can become a successful wedding videographer for years to come.
Figure out the costs of running your business and then factor that into how much you plan on paying yourself every month. If you want to match what you currently earn then you need to be earning more than you do every month right now. Why? Because you will have to not only spend money for one off things like equipment and training, but also for other things like your website, email, cloud storage, etc. And you will need to factor in that you will have to pay tax on your earnings too.
In your first few years of business you will likely have to cut back on some of the luxuries you might be accustomed to. But don’t worry, it doesn’t last forever. This short term loss for long term gain will only be a small stepping stone on your road to becoming a full-time wedding filmmaker.
And on that note, don’t quit another job until you are ready to do so! Seriously, don’t!! I was lucky when I created my wedding film business as I was fresh out of university, lived at home and didn’t have a mortgage or kids. I was in a position where I could drop everything else and focus solely on my business and it still took me about three years to reach a point where I was able to pay myself a consistent wage.
You will have to be realistic with yourself about how much you can earn, save and spend each month from your business and make sure you are very comfortable with knowing how to make it continue to grow before you remove the safety net of a stable job. The wedding industry as a whole is saturated with hundreds if not thousands of suppliers offering exactly the same as you, so you have to be sure you can draw in the right clients in the right numbers to support your business. Don’t feel pressured into making a leap before you are ready, but at the same time don’t be afraid to set yourself goals that may seem a bit scary to achieve.
Look at what everyone else is doing and see if you can do it differently. This may sound strange, because if everyone else is offering something and it’s working for them then surely it should work for you too, right?
While you’re not wrong, it definitely is important to take a look at what is currently being offered in your niche and figuring out why people are drawn to it. But if you are able to put yourself in a position where you are one of the first people to offer the same product in a new and innovative way then you are immediately setting yourself apart from 90% of other filmmakers. It may not suit every couple, but if you are offering it as an additional extra then they don’t necessarily have to choose it.
Embrace what makes you different, whether it’s the end product you provide, the service you give your couple’s during the enquiry stage, or even how you brand and market your product.
And finally, the biggest and most important piece of advice I can give you is to invest in yourself.
For as long as you run your business it is important to make the effort to constantly grow and develop new skills. Setting aside the time to learn from industry experts at workshops, online courses or reading books will only serve to fill in gaps in your knowledge and strengthen your work not only in practical filmmaking but also in marketing and business development.
Identify what areas you are weakest at in either your filmmaking or running your business and discover what courses are out there that help you bridge the gap between you and your goal.

All The Equipment You Need To Be A Wedding Filmmaker In 2021
You can’t shoot a wedding without the right equipment! Keeping your kit lightweight and compact will make a world of difference at a wedding. You will want to keep everything on you at all times in order to make sure you’re not running back to your car to grab a lens that wasn’t in your bag. I said it earlier, but you really can’t afford to miss a shot on a wedding day!
You can’t shoot a wedding without the right equipment! Keeping your kit lightweight and compact will make a world of difference at a wedding. You will want to keep everything on you at all times in order to make sure you’re not running back to your car to grab a lens that wasn’t in your bag. I said it earlier, but you really can’t afford to miss a shot on a wedding day!
Getting great imagery and perfect sound might sound impossible with a lightweight and compact kit, especially if you are used to working on larger productions, but believe me when I say it isn’t as difficult as you might think! It just requires a bit of creativity and the ability to troubleshoot in the field.
EQUIPMENT FOR WEDDING VIDEOGRAPHERS 2021
Cameras
When it comes to camera and lens choices I know that everyone has their own opinions on different systems and brands, either way, if you want to get into filming weddings you absolutely need to shoot on a DSLR or mirrorless camera. Expensive cinema cameras will slow you down and make you stand out on a wedding day and make everyone in the room feel very uncomfortable. If you want to get the nicest, most natural imagery you can then opting for a smaller camera will benefit you greatly.
Aside from choosing a small camera body here are some other factors to consider:
Good in low light for venues with bad lighting
In body stabilization
Possibility to shoot in 4K
Full-frame sensor for cleaner image
While all of these factors would be ideal in a camera, they aren’t essential to making your wedding films the best they can be. There is always a solution to every problem!
However, if I were to begin my wedding filmmaking career again and wanted a camera that fits all of the criteria above I would choose the Sony a7 iii as it is the perfect camera for the job, and even has a sensor size large enough to work for wedding photography too!
If I were on a tighter budget and still wanted to meet all of the criteria I would maybe choose a second hand Sony a7s ii as it is still a fantastic camera more than capable of filming a wedding!

best full frame camera for wedding filmmaking

best second hand camera for wedding filmmaking
Lenses
This is another highly personal aspect of choosing a kit for wedding filmmaking, but it wouldn’t be fair if I didn’t mention it. Choosing the right lenses for the job will be critical in getting the best footage possible for your films. Regardless of what camera you choose you will want to try and save as much weight as possible with your lenses as they are easily the heaviest part of your whole setup.
For me, I use what I refer to as my ‘holy trinity’ of lenses. I use these lenses on literally every shoot I go to and they never leave my camera bag. Because you can never guarantee how good the lighting at a venue will be, I opted for lenses with a wide aperture to let as much light in when I’m in dark rooms.
My go-to lenses are as follows:
Between these three lenses I am covered for pretty much every eventuality! I will usually keep the 50mm or 70-200mm on my A cam and the 16-35mm on my B cam so I can quickly swap between focal lengths.
I would highly recommend that every wedding filmmaker have some kind of similar lens lineup in their kit ranging from wide-angle to longer focal length lenses as you never know when you will find yourself either at the back of a room and can’t get close enough to your subject, or way too cramped and can’t get far enough away.

Best wide angle lens for wedding videography

best portrait lens for wedding videography

best long range lens for wedding videography
Audio
Now this is where things begin to get interesting! At a wedding, audio is so so soooo important and it is guaranteed to be the one thing you are going to stress about more than anything else on the day!! Why? Because it’s so easy for it to go wrong very quickly!
The two main points in a wedding day where the audio matters the most is during the ceremony and the speeches, the two times where you can’t intervene and stop everything if your equipment fails. That’s the exact reason you want to have multiple sources of audio to make sure that even if one source fails, you have more than one backup of it.
So where do you start with capturing great audio for your ceremony and speeches? It will mostly depend on a venue to venue basis, but that's exactly why you will have more than one type of recorder so you can tackle any situation that arises.
Before I tell you how to approach these situations I first need to introduce you to the equipment you will need. (I personally own all of this equipment in these exact numbers! I do everything I can to make sure I have the absolute best sources of audio I can!)
Budget Friendly -
4-5 x Sony TX650

Best Value for Quality -
4-5 x Zoom H1n or Tascam DR-10L
If you chose the Zoom H1n you will also need 3-4 Shure MVL/A Lav Mics

best value external recorder for weddings

Best value lavalier microphone for weddings

best all-in-one lav and recorder for weddings
Additional Gear For Professional Level Sound -
1 x Zoom H5
A whole heap of XLR cables and adapters

best quality wireless kit for weddings

best value digital wireless kit for weddings

best professional external audio recorder
So now that you have seen what you’re going to be using, it’s time I told you how to use it in the most effective way!
Regardless of whether you choose the cheaper or more expensive equipment I just listed, this is the best way to mic everything up for a wedding ceremony.
Start by putting your best microphone on your groom. In my case, this will always be my Tascam DR-10L but you can also easily use the Sony TX650. Try and position the microphone near the flower on the lapel of their blazer, this hides the mic from your shot and also makes it less noticeable for everyone else, meaning everybody feels more comfortable!
Next I will use another DR-10 on the podium where the readings will be taking place. I will usually wrap my lav mic around the microphone that is being used at the podium to help hide it.
After that I will find the officiant and pop a Sony TX650 on them. I use this because most officiants, regardless of whether it’s a church wedding, humanist ceremony, or local government officiant, don’t like having a larger recorder and lav mic attached to them. I’m not sure why, but that’s why I have the TX650’s, they’re small and nobody ever has a problem with them!!
Finally I will position my remaining microphones near any musicians and also near a speaker in the ceremony room. This is to make sure I get clear audio of the music that’s played and also to act as a final backup in case all of my other sources of audio fail.
Not every wedding is the same, so not all weddings will have all aspects of the ceremony I mentioned above. That said though, if you have at the very least 5 of the Sony TX650’s you will be more than well on your way to being able to cover 95% of the situations a ceremony will throw at you.
Having more audio equipment than you need will give you the flexibility to tackle unexpected situations, like there not being a podium for ceremony readings. In instances like that I will find the people giving the readings before the ceremony starts and mic them up with a TX650 and use my Zoom H1n’s with a lav mic for the groom and officiant. The key to making it a success is to have microphones to spare to make sure that nothing gets missed!
When it comes to getting the best audio for speeches, there are three main ways to tackle it.
The simplest method is to find out who will be delivering speeches before the day of the wedding and making a mental note of who they are on the day. Approach them before the speeches and individually mic them up with either a Zoom H1n and lav combo/Tascam DR-10L or the Sony TX650’s.
Another simple method is to use a TX650 or Rode Wireless GO on the venue’s own microphone with a custom made elastic microphone sleeve. For this you will need to buy some wide black elastic that you can sew together into a cylinder. I have made several of these in varying diameters to fit most microphones I come across. It’s really easy to slip over the venue’s microphone and slide my own mic inside that just before the speeches begin. Just be sure to check the venue staff are okay with it first!
The final method is the most involved and the most technical to pull off. It definitely gives the best results though. For venues that use wireless microphones, you can use your Sennheiser G4 receiver to tap into the frequency of their mic and essentially record the audio direct from their microphone! However, for venues that use wired microphones, you will need to check with the venue staff in advance if you can take a look at their sound desk to try to get a line out from it. In most cases, you should be able to take an XLR cable and get a direct line out that runs into your field recorder; though occasionally you may need to use a splitter cable to get a clean signal too. I would only recommend using this method if you are reaaallllyyy confident you know what you’re doing, as a lot of venues don’t even know how their own sound system works. If something goes wrong it will be on you to fix it!
Aside from the ceremony and speeches, you will also want to try to capture other audio throughout the day to incorporate into your films. Whether it’s guests congratulating the couple, an intimate moment between a bride and her parents, or anything in between, you will want to make sure that you can capture what is said in those moments in a higher quality than the audio from your cameras onboard mic!
That’s why I would highly recommend every filmmaker to use a top-mounted shotgun mic. These are invaluable for capturing high quality audio, and when paired with a wind shield you can film in almost all conditions indoors and outdoors.

best shotgun mic for travel filmmkaing
Throughout my wedding filmmaking career I have seen almost every type of audio situation there is when it comes to ceremonies and speeches. Really the only solid advice I can give you is to make sure you have multiple microphones for every possible situation. The more flexible you can be and the more backups you have the less stressed you will be if one of your sources fail mid-recording.
Bags
Remember earlier when I said that it’s important to make sure you have everything you need for the day close by in case you need it? Well this is the moment that you discover just how I manage to keep (almost) everything on me for the duration of the wedding day.
Having a good quality and spacious bag means you can pack as much gear into it as possible, all while being confident it can take the weight of everything inside it.
Just like cameras and lenses, choosing the right camera bag for you will likely be a really personal decision. Though just because it’s a highly nuanced choice for everyone doesn’t mean I can’t give you pointers on what to look for and what I’ve found works best for me and my style of filmmaking!
For me, there are four main criteria I am looking for in a camera bag for weddings, and here they are in order of importance:
Plenty of room and dividers to compartmentalise equipment
Very easy and fast access to all pockets and compartments
Great build quality to support weight
Blends in with the surroundings of a wedding
Using these four points really helped me narrow down exactly what it was I wanted in a camera bag for weddings.
What I found worked best for me was using a sling or over the shoulder style bag as it meant I had instant access to all of my lenses, batteries and audio gear at a moments notice. Over the years I’ve changed what kind of shoulder bag I’ve used as my equipment grew in weight and size I know exactly what worked and what didn’t for me.
At the moment I absolutely love using my ONA Union Street messenger bag as it has more than enough space and pockets for me to bring along my two cameras, three lenses, batteries, cards and 95% of my audio equipment all in one bag! It’s definitely a pretty packed bag but it is more than up to the task!
Before I took the leap into using ONA bags, as they are quite pricey, I used a ThinkTank Retrospective 30 as it performed in the exact same way and had plenty of space to fit all of my equipment into as well. The only drawback for me with this bag was the use of velcro in the bag. It may not seem like a big deal, but I didn’t enjoy needing to get something from my bag in the middle of the ceremony or speeches as the velcro would make noise. To you, this might not be an issue but it’s definitely something to consider!
If you don’t like the idea of either of these bags then you could also definitely check out Peak Design’s Everyday Messenger as I have seen plenty of photographers and videographers use it. Alternatively, if you are looking for a sling bag that is much more budget friendly, then you might want to check out lesser-known camera bag manufacturers like Kattee’s Vintage Style Canvas Camera Bag.
When it comes to the final 5% of my equipment that doesn’t fit in my main camera bag, I have those in hard cases like this one for my remaining audio gear, or I just pack it into my old camera bags I don’t use as often.

perfect bag for Wedding filmmakers

professional messenger bag for wedding filmmakers

most versatile messenger bag for filmmakers
Stabilisation
Most modern day cameras and lenses have really incredible stabilization built into them but don’t rely on that to save your footage from wobbles and shakes. The more points of contact you can give your camera the better and more professional your footage will look. In that same vein, you also shouldn’t rely on constantly filming in high frame rates to slow your footage down while editing. I’ve already written about why I don’t like shooting in slow motion so I will spare you another lecture, but just know that a 3-5 minute wedding film of nothing but slow-mo shots won’t have the same feeling of professionalism as a wedding film shot at 25fps that took more care in its framing and lighting.
Before I go off topic any further, let’s get into the good stuff!
When it comes to stabilising your footage at a live event like a wedding, you don’t want to be slowed down by having to constantly pick up a tripod, set the height, level the tripod head and find your framing before shooting. Enter the monopod! These bits of kit are perfect for giving almost all of the stabilisation as a tripod, without sacrificing any of the mobility.
My Manfrotto Monopod was the first bit of kit I bought when I decided to make filmmaking my career, and it has come with me on almost every shoot and travelled with me across the world. To say I love this thing is an understatement!

best monopod for wedding videographers
If you’ve followed my advice from before and have chosen to bring two cameras to a wedding for multiple angles during ceremonies and speeches, then you will need to bring at least two tripods for them. The good news is that you only really need to buy one good quality tripod to use with your A Cam, as you can pop your B Cam on a cheaper tripod with a wider angle to act as a safety shot.
For your more expensive video tripod, I would choose something like the Manfrotto MVK500 Series of tripods, as they are sturdy, lightweight for a tripod in this price range and also fairly priced for the quality your receive. That said, if you have the budget for it and want a nicer quality tripod then I would choose a Sachtler Ace XL Tripod because the stability and quality of the tripod are second to none and you will probably never need another tripod ever again.
Thankfully, your second tripod doesn’t need to be as eye-wateringly expensive as those two. For your B Cam you can choose just about any travel tripod, as you will most likely just ‘set it and forget it’. So that’s why I would recommend choosing something like the Neewer Travel Tripod for your second camera.

best value tripod for wedding videographers

best quality tripod for wedding videographers

best lightweight tripod for wedding videographers
The way that I film weddings means that my monopod and tripods are the only stabilisation I bring with me, however, I know that a lot of other wedding filmmakers love to use gimbals. If you are a newcomer to weddings and filmmaking in general then I would recommend staying away from using gimbals as they just complicate the day. You will have to take time out of filming guests and the couple in order to balance your gimbal perfectly, and believe me when I say that I speak from experience that your couple would much rather have footage of their guests and family than a handful of gimbal shots of a room or them walking together.
If you are still dead set on getting a gimbal though then I would recommend either a Glidecam or a DJI RSC2, just don’t say I didn’t warn you when you can’t be bothered bringing it out during the wedding day!
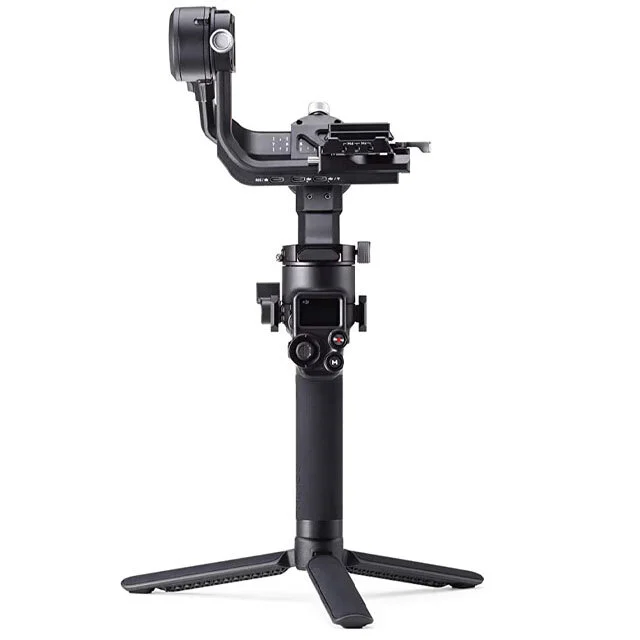
Best electronic gimbal for wedding videographers

best handheld gimbal for wedding videographers
Lighting
Really? Lighting? At a wedding?? Yes actually! Weddings differ from country to country, region to region, couple to couple, so you can never be sure of how a venue will look, especially at night time or in the long dark winter months.
It took me a really long time to bite the bullet and buy a light to bring along to weddings but ever since I did I have never looked back. In the UK and Ireland, where most of my weddings take place, it varies wildly as to whether a venue or a band will have good lighting for a dance floor or whatever is happening for the evening entertainment. I once ended up shooting a couple’s first dance in complete darkness because the venue and band didn’t have any dance floor lights. The photographer had set up flashes around the dancefloor and got great photos but I ended up with really noisy and muddy looking footage. That’s when I knew something had to change.
Thankfully it doesn’t take much to fix this problem! In fact, all you need is one light!
As with all the gear I use at weddings I like to try and keep it as lightweight and as small as possible, that’s why I would recommend picking up the Godox S30 or Came Boltzen B30 LED spotlights. They both can run off a single Sony NP-F battery, meaning you aren’t stuck looking for a power source, and they both give out very similar qualities of light.

best quality portable LED Floodlight

best budget led spotlight for wedding videographers
My personal preference would be the Godox as it’s very similar to the Aperture LS Mini 20D’s that I use, but the Came Boltzen is just as capable!
I will use this single light source to flood the dance floor as a backlight and then shoot towards it for the couple’s first dance. It’s absolutely incredible to see the difference a single, focused source of light can make to your dance footage. Using a spotlight like this allows you to cut through any coloured lights a band might bring for the dance floor, add shape and shadow to the people dancing and in the worst case scenario even allow you to save what would have been a completely dark dance floor, in short, no matter the situation it elevates the whole look!

Stop Shooting In Slow Motion
Capturing footage at higher frame rates and playing them back at a slower 24 or 25 frames per second is a really useful filmmaking tool for heightening the emotion or tension in a shot. Actions that would usually happen in the blink of an eye can be extended out for the audience to not only see what’s happening but also feel the moment that it happens. Slow motion shots are the perfect way to tap into your audience’s suspension of disbelief and captivate their attention. But only if you use it right!
Capturing footage at higher frame rates and playing them back at a slower 24 or 25 frames per second is a really useful filmmaking tool for heightening the emotion or tension in a shot. Actions that would usually happen in the blink of an eye can be extended out for the audience to not only see what’s happening but also feel the moment that it happens. Slow motion shots are the perfect way to tap into your audience’s suspension of disbelief and captivate their attention. But only if you use it right!
There is no shortage of tutorials on YouTube teaching you how to ‘FILM EPIC SLOW MOTION BROLL’ or ‘Shoot CINEMATIC slow motion like a PRO’, and chances are you’ve probably watched and learned from them too! In fact, they’re really great resources to learn how to accomplish the technique! The problem is that most of these tutorials end it there. They don’t take the next step and tell you the why or the when you should be using slow-mo footage.
If you’ve read any of my other articles you might have noticed that I have brought this up before, but knowing why you should be using a technique or a tool is often more important than knowing how to do it.
As a result of this readily available information, and with so many aspiring filmmakers all too eager to learn the techniques and put it into practice, there has been an explosion of short films, travel videos and even wedding films that are using an excessive amount of slow-mo footage. However, as cool as slow-mo shots look they have a pretty specific purpose when making a film or video.
So why should you not be shooting slow motion footage? By the very nature of slowing down a shot, you are signalling to your audience that this is something important and that they should be giving it their full attention. It’s kind of the video equivalent to changing the tone of your voice, writing in all caps, or sticking a bright neon sign on a shop window. You are trying to draw people’s attention to something in particular.
In traditional big-budget TV and filmmaking you will notice that slow motion shots are sparingly used, if even at all, through a movie or series. You might see it being used to signal the first time a character meets a love interest, during a fight scene to really draw attention to the impact of a hit, or maybe even as a hero has a near-death experience. All of these moments are times when the people creating the film want the audience to be right on the edge of their seats, drawn further and further into the story of the world they’re creating. The slow-mo shots always have some kind of significance or meaning attached to them.
Think of any video you’ve seen recently that used slow-mo footage. Now think about the shot that stuck with you from it. I’d take a guess and say that the reason it’s resonated with you is that it drew your attention to a moment of heightened emotion or added a bit of visual flair to an otherwise average shot.
And that’s where I think that most new filmmakers get hung up on shooting and editing everything in slow-mo. The slowed footage is making them feel like their footage is better than it actually is. When it’s converted to a lower framerate while editing it is taking their ‘average’ shot and creating the illusion that it is somehow better than it was before.
Truth be told, I’ve been guilty of this in the past too. Recording at 50fps and playing it back at 25fps somehow made my bad footage feel more professional. In the earliest videos I made, the majority of my footage was playing back in slow-mo making me believe that my videos were great! Unfortunately, all I did was make my bad shots drag on for much longer than they should have…
All of this is to say that it is very easy to fall into the trap of using high framerate footage as a crutch for poor filmmaking. You should be putting your effort into your lighting, composition and storytelling before you even consider filming a shot in slow motion. Know and understand what utilising slow-mo footage will do to the narrative you’re telling before you make the decision to use it.
How then, are you supposed to figure out when is the right moment to capture slow motion footage? Really it will depend on your project, the story you’re trying to tell and the emotions you want to try and evoke in your audience.
Take travel films and vlogs on YouTube for instance. I’ve found these to be by far the worst offenders when it comes to using too much slow-mo footage, so it makes sense to draw the comparison here. Dragging out shot after shot in slow motion, each one telling the viewers that it is something ‘important’ to look at without delivering anything of real visual or emotional value, only serves to distract the viewer and draw their attention away from the video. Instead, the creators would do their work much more justice to use the slow-mo shots sparingly and at moments that they want to emphasise.
For a travel filmmaker who is making a film about hiking up a mountain, this could mean only using slow motion footage once they reach the summit at sunrise, or using it to accentuate a moment of connection with a local who opened their home to them for the night. Making these conscious decisions of when and when not to use slow motion footage will only serve to make you a better filmmaker.

Everything You Need To Become A Travel Filmmaker In 2021
Travel filmmaking is one of the most exciting and challenging specialisations any filmmaker can make. It’s equal parts demanding and rewarding. It’s certainly not a profession for the faint of heart! You have to have a deep desire to get out and experience the world and need to have the right technical skills and creativity to make all of it come together.
Travel filmmaking is one of the most exciting and challenging specialisations any filmmaker can make. It’s equal parts demanding and rewarding. It’s certainly not a profession for the faint of heart!
To make a career in travel filmmaking you will need to not only be comfortable with travelling and the stress that can come with travel arrangements not going to plan, but also be comfortable in documenting everything that is happening around you at all times. Every experience you have while on the move is just a small part of the bigger picture and you will need to document the right parts in order to tell the story.
You have to truly love both travelling and filmmaking. Flying out to a new city once a year and making a one minute montage of clips isn’t going to cut it. You have to have a deep desire to get out and experience the world and need to have the right technical skills and creativity to make all of it come together.
Feel a little scared about that? Good! You should be!
That means you’re ready to hear what it takes to become a successful travel filmmaker!
The Mindset
Unless you have somehow landed a job at a travel filmmaking production company then chances are you’re going to have a lot of work to do to get noticed. It’s going to take a lot of time and money, so you better start saving for trips now.
Your passion for filmmaking and travel has to turn into more than just an interest. It has to become an obsession. Watch travel documentaries, read up on the best places to visit on a budget and begin planning everything to the finest detail.
Watching and consuming as much content as you can give you ideas on places to visit and explore and also what kinds of moments you should be trying to capture on video and how to edit.
Find other travel filmmakers who you love the work of and really study what it is about their work that draws you to it. Learn everything you can from what they create.
Before you ever go on your first trip you have to make sure you know your equipment inside out. Every spare moment and free weekend you have should be spent actually making things to hone and practice your skills. You should be able to do this in your sleep because while you’re travelling if a moment happens and you don’t have your camera in your hand it’s gone forever.
Practice other skills too. You never know what will come in handy! Back in the day, a travel film would have been produced by an entire production team. There would be production coordinators, camera and sound crew, a director, you get the idea. Nowadays equipment is so much smaller than it used to be and gone are the days of large crews for travel films (well mostly anyway). These days most travel film production companies and the people that hire them are looking for people who are skilled in more than just one area. It’s not enough to just be really good at capturing genuine moments. You need to know how to capture audio, edit everything together, colour it appropriately, and how to keep everything on schedule when travel plans inevitably go off track. If you want to be a professional then you have to have a very diverse skillset.
The Equipment
It is absolutely incredible how good the quality of modern-day phones are when it comes to capturing video and photo but if you want to make it as a professional then that, unfortunately, isn’t going to cut it in the long run.
You will want to take the leap and invest in some good quality equipment to make your films look their absolute best!
When travelling you generally want to travel as light as possible, and doubly so if you’re bringing camera equipment with you! Shaving kilos from the weight of your camera kit will make it easier to get around and make you blend in with other tourists and locals. The more you fit in with your surroundings the more likely you are to capture great shots.
So what would I recommend for an aspiring travel filmmaker? Read on to find out.
Tripods
First of all, I would start with a good, lightweight tripod or monopod. These are essential for stabilising your footage, particularly if your camera and lenses don’t have image stabilization of any kind. And even if they do I still think one of these is essential!

best travel tripod for video

best tripod + monopod combo for travel
professional level monopod for video
Cameras
Small, lightweight and incredibly powerful. That’s what you’re looking for in a travel-friendly camera. I would choose the Sony a6500 for its size and capabilities but I would also recommend the Sony a73 for those who want the look of a full frame camera.

best aps-c camera for travel filmmaking
best full frame camera for travel filmmaking
Lenses
Your collection of lenses will probably be what weighs the most in your kit. Choosing zoom lenses over primes will help you save weight and more importantly prevent you from swapping lenses and missing a crucial shot!
Best General Purpose Lenses

best all-purpose lens for aps-c

best all-purpose lens for full frame
best low light lenses

best low light lens for aps-c

best low light lens for full frame
Depending on what you want to capture you might also want to take a look at some ultra-wide lenses for astrophotography or super zoom lenses to capture footage of wildlife or vistas that might be very far away.
Audio
Having good sound for your films is actually a lot more important than having good visuals. Most people will stop watching a video if the sound is awful, but will stick around longer if your footage is shaky or not exposed correctly as long as the audio is clear and sounds great. Take it from me, it’s better to travel with one less lens as long as you can bring some great audio gear.
First to consider is the audio into your camera. Getting good audio here means you don’t have to sync it up while editing and is great for capturing moments as they happen.
Best Travel Shotgun Camera Mics
best shotgun mic for travel filmmkaing

budget shotgun mic for travel filmmaking
However, there may be times you want to set the camera up and walk into the distance while still getting clear audio of what you’re saying. In that case, you’ll need a wireless system to go into an external recorder or your camera. You can either use this by itself or plug in another microphone to the transmitter and use that to hide the system.
best wireless microphone for travel
If you don’t trust running new audio into your camera and want to sync it while editing then you will need a field recorder of some kind. These will allow you to capture audio even if your camera isn’t on and add an extra layer of security in knowing you caught great audio!
Best external field recorder for travel
best field recorder for travel filmmakers
budget external recorder for travel filmmakers
Other Essential Gear
You will also need to have a lightweight laptop and hard drives to handle your editing and data storage as well as plenty of SD cards to make sure you don’t run out of space! Laptops are a very personal choice and you likely have one that is perfect to use already however here are my top picks for all the other small, but no less essential, equipment you will need.
fast SD card for reliable capture
faster SD card for super fast write speeds

Small and fast ssd for storing files

quality variable ND filter for filmmakers
Travel camera bag
Having a camera bag you can rely on will be key to making your travelling easier. There are three main things I look for in a travel camera bag.
Comfort - You’ll be wearing it all day so it needs to be comfy as hell. You don’t want to be an hour into a full day hike and already feel the weight of your bag on your shoulders.
Security - There’s a lot of expensive kit in there. It needs to be safe! This means I want the camera access to be only from the back of the bag. I want to be able to not have to put the bag down to get equipment out, and most importantly I don’t want it to scream “Hey! I have loads of valuable stuff in here!”
Space - It’s very easy to stuff your bag with only your equipment. You want to capture as much as possible and you want every tool at your disposal after all! But you also need to remember that if you’re on a day trip in a city or a mountain you will probably want space for extra layers if it’s cold or raining, plus room for snacks, water and anything else you might need. Don’t make the same mistake I did by only having camera gear and then feeling miserable and hungry half way through the day!
So with all those criteria in mind here are my top picks for travel worthy camera bags!
NOMATIC x McKinnon Camera Pack
This bag was made alongside YouTube sensation Peter McKinnon.
He’s travelled extensively over the course of his YouTube career and knows exactly what every photographer and filmmaker needs while travelling. In my opinion, this is honestly as close as a bag gets to perfection for a travelling filmmaker!

perfect bag for travel filmmakers
Lowepro ProTactic 450AW II
This bag takes a very close second! There is so much room in this bag for a lightweight kit plus snacks and clothes for a day excursion. My only complaint is that there isn’t a dedicated section of the bag for this. But I love it all the same.

professional camera backpack
Peak Design Everyday Backpack
If you only plan on doing short trips and travelling incredibly light then this bag will be the perfect fit for you. Its size forces you to choose only your most important equipment and is perfect if you are creating a film in a city or built-up area.

most versatile travel backpack
Creativity and Making Money
Having the best and most expensive gear won’t make you successful overnight, nor does it guarantee that you are going to immediately be making the best travel films. The only deciding factor for your success is going to be you and your drive to make travel filmmaking your lifestyle and career.
There is no set path to ‘making it big’ in this industry and there is no way to know how people will react to your brand of creativity. However, what you can do to begin earning money as soon as possible is to begin uploading and selling clips from your travels to stock video agencies. Genuine and interesting moments are normally in very high demand and should sell quickly. Don’t think you can just make a living off stock footage though, you will probably need to take on freelance filming and editing gigs to maintain your lifestyle and pay for your next flight.
Once you have created films you are proud of, reach out to companies within the travel industry and see how you might be able to help boost their brand message on social media. It is highly competitive out there so you have to make sure your work stands out from everyone else out there!
And on the subject of standing out from the rest, make sure that you aren’t just copying another travel filmmakers style. YouTube, Instagram and TikTok are filled with travel films and videos that are packed with transitions from shot to shot that have no link or connection to each other. Try to avoid creating films that rely on these heavy-handed techniques just because they might look cool. Discover your own voice and tell the story of the places you visit. Whether it's through your own eyes or through the eyes of the people who live there.
Talking to locals and hearing their stories and experiences will give you a fuller understanding of the places you travel to and will only elevate your work as you tap into what connects us all together. Uncovering these stories and following them until your films reach a satisfying conclusion will be so much more fulfilling than a 2-minute edit of cool shots and transitions.
There is a lot to take in and learn all at once, but if you truly love travelling and filmmaking then dedicating yourself to it is the only thing you can do.
Filling up your camera bag will take time as there’s no fast-track way to success. Start small and slowly work your way to a position where you are funding your own trips and creating your own films. Eventually, you will reach the point where brands will want to work with you and that’s when you begin making the money to sustain your passion and your lifestyle!
If it’s something you truly want then you have to put the work in! Good luck out there!

The Best Audio Equipment For Videographers and YouTubers In 2021
As a filmmaker, YouTuber or content creator of any kind you will quickly find that even if you have fantastic looking footage, your audience will be immediately turned off if the audio doesn’t sound amazing. You may have heard that sound is half of making a film and it honestly is so true. Bad audio can kill a video dead in the water, leaving your audience unsatisfied, or worse, make them stop watching your work altogether.
As a filmmaker, YouTuber or content creator of any kind you will quickly find that even if you have fantastic looking footage, your audience will be immediately turned off if the audio doesn’t sound amazing. You may have heard that sound is half of making a film and it honestly is so true. Bad audio can kill a video dead in the water, leaving your audience unsatisfied, or worse, make them stop watching your work altogether.
Thankfully the cost of good quality audio equipment has never been more affordable! Meaning you can rest easy knowing that your sounds will match perfectly with your visuals and keep your viewers entertained.
Best shotgun mics 2021
RODE VIDEOMIC PRO+
Pros -
Great quality, fantastic sounding audio, easy access control buttons
Cons -
Expensive, larger than other shotgun mics
RODE VIDEOMIC GO
Pros -
Very affordable and reliable option, better than your camera’s internal mic
Cons -
Lower signal output than other mics

RODE VIDEO MICro
Pros -
Very small form factor, comes with windshield
Cons -
Low signal output making for noisier audio
best lavalier mics 2021

RODE SMARTLAV+ WITH SC3 ADAPTER
Pros -
Warm sounding lav mic, low background noise pickup
Cons -
Requires adapter to work with most cameras and external recorders
SHURE MVL OMNIDIRECTIONAL LAVALIER
Pros -
Bright sounding lav mic, all-in-one lav system, low background noise pickup
Cons -
Shorter cable
Best wireless microphone kits 2021
RODE WIRELESS GO
Pros -
Super compact wireless mic and receiver, great sound
Cons -
Windshield clip is difficult to attach, no locking thread for lav input
SYNCO WIRELESS MICROPHONE SYSTEM
Pros -
Cheaper alternative to Rode, comaparable quality, comes with lav
Cons -
Larger in size, lav input on side of mic
best external audio recorders 2021
ZOOM H1N
Pros -
Easy to use, versatile, very durable
Cons -
No locking thread on input

TASCAM DR-05X
Pros -
Smaller than Zoom H1n, easy to use, versatile
Cons -
No locking thread on input, no shielding for internal mics
ZOOM H5
Pros -
Records multiple tracks of audio, pro-use XLR inputs, modular top inputs
Cons -
Expensive, setting levels manually is confusing without exeperience
So where do you start with capturing good audio? The best first step you can take is by upgrading the audio of whatever camera you are shooting on. If you are using a modern DSLR or mirrorless camera chances are the built-in microphone is decent but the sound quality falls apart when you are in busy places or windy conditions. That’s why most of these cameras have a 3.5mm jack to run an external microphone into the camera.
There are so many different types of mic on the market, each with a different purpose, that it can be tough to know which to choose. So here is a quick breakdown of what each type can do.
Shotgun microphones are great for picking up general ‘scratch audio’ that can either be used to sync up an external audio source or as your main audio source if you can get close enough for good sound quality. Most shotgun mics are directional meaning that they are perfect for cutting out noise that is behind or to the sides of the microphone.
Lavalier mics are used extensively in interviews, presentations, documentaries and on live TV programming. They can be clipped onto clothing and when plugged into radio mics or other wireless systems are extremely versatile in allowing your talent to move around without having to worry about staying close to a camera to keep their voice heard in the recording.
External recorders can be used in conjunction with shotgun and lavalier mics to record audio separately from your camera. This does mean you will have to know how to sync your audio while editing, but it is a fantastic way to capture more than one audio source at a time. Most external recorders also have their own multidirectional microphones built into them, making them even more versatile, especially if they can record multiple tracks of audio at the same time.
Okay, now that you know what types of microphones there are out there and roughly what they do now comes the important question. Why do you need a separate microphone?
Not having a mic other than your onboard camera mic means that you are stuck to recording the sound that is nearest to you and your camera, not the source of the sound that you want to record. If your subject is directly in front of your camera in a quiet room this might be okay, but the farther they go, the lower their sound level will be in camera. If you are in a busy or noisy place they will also have to compete with the ambient sound there too.
Having your microphone close to your subject will make all the difference in getting the clearest audio possible. You may not always have time but it is always worth the effort to try and mic up your talent separately to your camera if you can!
Best top mount DSLR and Mirrorless Shotgun Mic
RODE VIDEOMIC PRO+
This is hands down the most used microphone I own. In fact, it never leaves my camera! The Rode Videomic Pro Plus is perfect for capturing audio when I haven’t had a chance to mic up my talent, recording small intimate moments at weddings and even for doing a piece to camera.
The versatility of this mic, combined with the easy access buttons on the back make it a must-have for professionals and beginners alike.
best quality shotgun mic
rODE VIDEOMIC GO
If the cost of the Pro+ is too expensive for you as a beginner then I would definitely recommend the Video Mic GO from Rode. It works in much the same way as the Pro+, just without the ability to control your levels or any other settings. This shotgun mic is about as basic as it gets, while still delivering a noticeable increase in audio quality to your camera!
best budget shotgun mic
RODE VIDEO MICRO
Don’t like the idea of having a big shotgun mic on top of your camera? No need to worry! The Rode Video Micro is here to save the day! This mic is super compact, at about half the size of the other shotgun mics I’ve listed.
The quality from the mic is slightly worse than the other two, but for this form factor alone it is perfect to fit on the top of cameras like the Sony a6400 and Canon M50 without looking out of place and adding a noticeable difference in audio quality to their built-in mics.
best compact shotgun mic
BEST LAVALIER MICS
RODE SMARTLAV+ WITH SC3 ADAPTER
I love these lav mics! For the price, they are an invaluable part of any aspiring filmmakers kit, especially if you find yourself capturing a lot of interviews or pieces to camera! The Rode Smartlav+ not only has the advantage of being a super small lav mic that is easy to place and hide on a subject but can also either be used by itself or with the SC3 adapter.
The adapter allows you to plug the mic into a camera or external recorder to capture audio, or you can use it without it and plug it directly into your phone to record the audio there!
best value lav mic
SHURE MVL OMNIDIRECTIONAL LAVALIER
If you don’t like the idea of needing to have a mic and an adapter for you lav mic then the Shure MVL lav is perfect for you! It has all of the same great features as the Rode Smartlav but as an all-in-one mic, meaning you can plug it into your camera, external recorder or phone to capture your audio. These mics are around the same price point and have very comparable sound quality so the real decision will come down to which you like the sound of more!
BEST WIRELESS MICROPHONE KITS
RODE WIRELESS GO
Yes, yes, I know. It’s another Rode recommendation… but for good reason! These guys really know how to make great quality sound gear! That’s why the Rode Wireless GO is a fantastic addition to any audio kit that needs you to transmit audio across a distance. These kits are much cheaper than the traditional radio mics that used to be used but they don’t miss out on quality.
You can use the Wireless GO as a standalone mic to capture your audio or you can plug your own mic into it via the 3.5mm jack if there is a specific microphone you want to use. This wireless kit is super versatile and I highly recommend it if you want to capture audio from a subject at a distance directly into your camera or an external recorder.
best value wireless microphone
SYNCO WIRELESS MICROPHONE SYSTEM
There have been a lot of wireless kits come out over the past few years and some are definitely better than others. The Synco kit is definitely one of the best non-Rode wireless kits I’ve used! It’s slightly bulkier and the mic-in jack is on the side of the transmitter, but it works just as well as the Rode! And at almost half the price I would definitely pick up this kit as my first wireless set if I didn’t already own the Wireless GO! Not only that, but it also comes with its own separate lav mic bundled in with the kit. Use the extra money you’re saving by choosing this option to pick up a good quality shotgun mic or cheap external recorder and you will be well on your way to building up your audio kit.
best budget wireless microphone
BEST EXTERNAL AUDIO RECORDERS
ZOOM H1N
Right at the beginning of my professional videography career, I bought five of the older model of this audio recorder and I still use them to this day. Given the right care, these recorders will probably last me until I’m ready to retire! I mostly use my array of these to capture multiple sources of audio at live events all at once so I can mix between them in my edits. These recorders only have one mic input into them, but are perfect for coupling up with a lav mic and putting onto your talent so you can record what they’re saying easily. It’s very easy to set your audio levels with these recorders too, or you can leave the levels on auto (that surprisingly does a great job!) which make them very beginner-friendly!
best value external recorder
TASCAM DR-05X
If you want a slightly smaller form factor for your audio recorder, or don’t like the user interface of the Zoom H1n, then your next best bet for a good quality external recorder is the Tascam DR-05X. This recorder comes with all the features I mentioned earlier for the Zoom so makes a great addition to any audio kit!
With its small form factor, you have pretty much no reason to not bring it along with you to every shoot!
best alternative external recorder
ZOOM H5
Sometimes you want to capture multiple sources of audio all at once, to one recorder. Enter the Zoom H5. This professional-level audio recorder is a must if you begin to find yourself needing to record more and more sources all at the same time. With this external recorder, you can capture and set your levels for up to four separate lines of audio all at once. You will need to make sure that the microphones or wireless kits you’re using have XLR mounts as that is the primary input for the Zoom H5.
best professional external audio recorder

Best Prime Lenses For Canon Cameras For All Budgets
Ready to take things to the next level and choose a new lens for your Canon camera? Let me help you by taking some of the guesswork out about which lens best suits what you want to try and shoot!
Ready to take things to the next level and choose a new lens for your Canon camera? Let me help you by taking some of the guesswork out about which lens best suits what you want to try and shoot!
What exactly are prime lenses?
Put simply prime lenses are lenses that have a fixed focal length. You can’t zoom in and out like you would with the kit lens that came with your Canon camera. If you want your subject to appear larger or smaller in the frame then you will have to physically move farther or closer to compensate.
This might sound like a limitation but in other ways, it’s an advantage. It forces you to think more creatively, compose your shots better and generally prime lenses are built better, give you sharper images and have faster apertures than zoom lenses.
Primes lenses are perfect for all forms of portrait, product, street and wedding photography. Depending on the focal length that you decide to use can open up whole new realms of creative possibilities for your work!
But if you are reading this article then you probably already know that you want to pick up a prime lens to expand your camera kit. So without any more hesitation let’s get into the list of which prime lenses I think you should use on your Canon camera.
35mm Prime Lenses For Canon Cameras

BEST 35MM PRIME FOR APS-C CANON CAMERAS

best mid-range 35mm prime for canon cameras

best pro level 35mm prime for canon cameras
As far as focal lengths go, anything at 35mm and under is generally considered as a wide field of view. For me, the 35mm focal length is the perfect middle ground of wide enough to be used to shoot landscapes and set up establishing shots but still not super wide where it feels strange to use it for portrait shots. It’s more of a happy middle ground between the two, and that’s why it’s such a versatile focal length!
The Canon EF-S 35mm f/2.8 is a fantastic prime lens for photographers who shoot on APS-C camera sensors like the Canon 250D and Canon 4000D. There are two main things to note about this lens, first, it will not work on full-frame sensor cameras (you need an EF mount, not an EF-S mount for those), and secondly, it also doubles up as a macro lens!
Using this lens will give you sharp images without much image distortion or fringing in the high contrast areas. The lens also has a built-in macro light in front of the lens element, allowing you to light up any macro shots you might want to shoot.
It’s small construction and lightweight materials mean there really is no reason not to bring this lens with you on any shoot. It’s versatility for landscapes, portraits and macro photography gives you almost no excuse to not have it in your camera bag!
It used to be that Sigma lenses were seen as ‘second-best’ when it came to lens choice for Canon cameras. Which was understandable because at that time there were very few lens manufacturers who could replicate the sharpness and quality of Canon lenses. Nowadays though Sigma lenses have really become a force to be reckoned with!
Owning my fair share of Sigma glass means I can heartily recommend the Sigma 35mm f/1.4 to anyone who is looking for a cheaper alternative to Canon’s L Series equivalent. From my own experience having shot with both this lens and the Canon L Series 35mm f/1.4, the Sigma 35mm focuses just as fast and as accurately as the Canon does. The images are just as sharp and the bokeh is almost identical. So what’s the catch? How can the Sigma 35mm be cheaper?
Ultimately it comes down to how it’s built (and brand name too, I guess). The price difference between the two stems from the fact that the Sigma 35mm is not weather sealed like the Canon 35mm is. This may not seem like a big deal but for some, more adventurous, photographers and videographers who spend more time shooting outside this could be a deal-breaker on picking up the cheaper lens, especially if you find yourself in rainy or dusty situations more often.
The choice between these two lenses will mostly boil down to your budget and the conditions you expect to be shooting in most frequently.
50mm Prime Lenses for canon cameras

best value 50mm prime for canon cameras

best mid-range 50mm prime for canon cameras

best pro level 50mm prime for canon cameras
The 50mm focal length is usually the focal length most photographers and videographers gravitate towards when choosing their first prime lens. And for good reason too! This focal length is the closest to the field of view to what the human eye sees. It’s simple to visualise what you’re going to get before you even begin composing your shot.
Shooting on a 50mm prime is perfect for portraits, products and can even be used to give landscapes a more ‘intimate’ feel to them. Using focal lengths in this range is perfect for isolating a subject from a background, and when you combine it with the benefits of shooting with a prime lens, it’s easy to see why this is the go-to focal length for portrait shoots.
Kicking things off for the Canon 50mm primes is the Canon 50mm f/1.8, also known as the ‘nifty fifty’. This is possibly one of the cheapest non-vintage lenses you will find on the market. This lens is incredibly small, light and overall is a good lens. As an introduction to prime lenses, you can’t really go wrong with this one. Especially if you are a complete novice to shooting on primes!
That said though, you do get what you pay for. While the lens is not a bad lens by any stretch of the imagination, it does lack sharpness and clarity that you would find in more expensive prime lenses. I see the Canon 50mm f/1.8 as more of a beginner’s first introduction to prime lenses. It’s great to learn with but probably should stay on the shelf at home if you’re going to a professional level shoot.
To make up for that shortfall though there is the Canon 50mm f/1.4 which is a perfect next step towards professional level glass. It is a much more sturdy construction than the cheaper 50mm f/1.8 and the images with this lens are markedly sharper. The 50mm f/1.4 was actually the first prime lens I bought and it served me well for around 4 years before I upgraded. It still lives on my shelf and sometimes I bring it with me to use on a second camera body as a backup camera for photography or to get safety shots as a second or third angle when I film weddings and documentaries.
Right at the top of the 50mm prime lens food chain is the absolutely incredible Canon L Series 50mm f/1.2. It may sound obvious but as one of Canon’s flagship series of photography lenses, the Canon 50mm f/1.2 is sharp from edge to edge, is ultra-fast at focusing, has beautiful bokeh and is all around a simply fantastic lens to use. Being at the top of the food chain comes with a catch though. Yes, you guessed it, the price. But as with all pro-level lenses, you get what you pay for.
85mm prime lenses for canon cameras

best value 85mm prime for canon cameras

best mid-range 85mm prime for canon cameras

best pro level 85mm prime for canon cameras
At 85mm focal lengths, things become quite interesting. It’s technically a telephoto type lens but it’s also not quite telephoto enough to shoot subjects that are really far away. It’s sort of a pseudo telephoto focal length. It has all of the characteristics of higher focal lengths like the great subject isolation, nice bokeh and perceived lens compression while still being wide enough to make it so you’re not right on top of whatever you’re shooting.
This makes 85mm prime lenses a go-to lens for portrait and wedding photographers. Everything shot on an 85mm lens tends to look beautiful, soft and as if it has a little bit of ‘magic’ to it. It’s hard to explain in words but if you Google 85mm portrait, landscape, travel, or any other kind of photography then you’ll understand what I mean. There’s just something about the 85mm prime that gives it an edge over other focal lengths.
Which is why it’s very easy to recommend the Canon 85mm f/1.8 to anyone wanting to pick up a lens in this focal length. Like the middle of the road Canon 50mm f/1.4, this 85mm has the same level of construction and weighs almost the same too. It has good sharpness from edge to edge and has very reliable autofocus. Overall, it’s the perfect entry-level prime lens for shooting portraits.
For a lens with better optics and faster performance, you might want to check out the Samyang 85mm f/1.4. It’s slightly heavier and larger than Canon’s 85mm f/1.8 but what it adds in weight and size it makes up for with super crisp images. The quality of the glass used in this lens would make you think it was a long lost twin of the top tier L Series 85mm. Most people wouldn’t be able to spot the difference between the two unless they started really delving deep into looking at the image. It’s a very strong contender as a middle of the road 85mm prime lens for Canon cameras!
Of course though, right at the top of the list is Canon’s very own Canon L Series 85mm f/1.4. Definitely the priciest option when it comes to choosing an 85mm lens but it is worth every penny. Lightning fast autofocus, absolutely beautiful bokeh and edge to edge sharpness are of course standard with all L Series lenses, however, using a lens like this to shoot with really does showcase how well these lenses perform. If you are seriously thinking about becoming a professional portrait or wedding photographer then you will probably want to pick up this lens as soon as possible!
135mm prime lenses for Canon cameras

manual focus 135mm prime for canon cameras

best mid-range 135mm prime for canon cameras

best pro level 135mm prime for canon cameras
If you liked everything you’ve heard and seen about 85mm lenses then you will be in for an absolute treat when it comes to 135mm primes. Lenses at this focal length are really effective at creating incredibly gorgeous beauty shots of landscapes, products and wildlife (though you might want higher focal lengths if your subject is really far away).
The lens compression at a 135mm is so beautifully smooth and silk-like that shots taken at this focal length tend to give your images a feeling of high quality and class. Of course, it entirely depends on your lighting and how you shoot but this prime lens can really elevate your work if used correctly.
And there’s no faster way to learn how to use them correctly than by picking up the Samyang 135mm f/2.0. As far as telephoto lenses go, it’s lightweight, sturdy and very very affordable. There is one catch to this specific lens though… it doesn’t have autofocus. Samyang instead has opted to ditch the motors inside the lens and make it entirely manual focus. For photographers, this probably isn’t the best news, but for those who shoot video it isn’t a deal breaker as you’ll be more used to manual focus anyway! At this price point though I still believe that this lens is an absolute steal, autofocus or not!
If the idea of having to manually focus all of your shots just isn’t working for you then don’t worry, as Sigma has come to the rescue! The Sigma 135mm f/1.8 is pretty pricey, but you are getting very reliable and fast autofocus from this lens, as well as getting to enjoy the sharpness and quality of Sigma's high quality glass.
And right at the top level, rivalling the Sigma 135mm is the Canon L Series 135mm f/2.0. Honestly, there is very little that separates these two lenses apart from each other. The Canon 135mm f/2.0 is every bit as fast, reliable and high quality as the Sigma. Leaving the main deciding factors between the two as your own personal preference, your budget and whether or not you need the dust and splash proof sealing that the Sigma 135mm prime provides.

Ditch Film School - A Guide To Becoming a Self Taught Filmmaker
Learning to become a successful filmmaker is hard. There is no way to sugarcoat it. It takes years of learning, money and creativity before you even manage to get to the starting line of becoming a halfway decent filmmaker, let alone a successful one. However, these days it has never been more accessible.
Learning to become a successful filmmaker is hard. There is no way to sugarcoat it. It takes years of learning, money and creativity before you even manage to get to the starting line of becoming a halfway decent filmmaker, let alone a successful one. However, these days it has never been more accessible.
Gone are the days of having to spend a literal fortune to pay your way into a film school, learn the ropes and leave education at the bottom of the ladder to success. The internet has decentralised the information and knowledge that you need to begin making films. For the cost of access to the internet, you can watch hundreds of hours of tutorials to begin teaching yourself how to make films.
In fact, chances are all you’ll really need to pay for is a camera, lenses and lighting, and the price of those have all become more affordable too!
So what’s the catch? Surely with all of this freely available information, there has to be some kind of drawback? Otherwise, film schools wouldn’t exist any more. To put it simply, not all of the information you see out there is created equal. Some of it can be fantastic and insightful and some of it can be pure rubbish. It will be up to you to decide what information is relevant to how you want to learn.
All of this is to say that you don’t need a formal education in filmmaking to be a successful filmmaker. Most people working on a film or TV set don’t necessarily have a degree related to film if any degree at all. What counts more than an education on set is that you work hard, get along with the rest of the crew and do a good job. Nobody will care that you wrote a dissertation and got your degree with honours if you’re not prepared to pitch in and work hard on set. In this industry, practical experience and proof you can do what you say you can, will always trump a fancy piece of paper you got from a college or university.
Where do you start then if you decide to ditch film school and become a self-taught filmmaker?
There’s no simple answer here as it depends on how experienced you are with your equipment and editing software, which niche of filmmaking you want to focus on, and your drive when it comes to teaching yourself. However, here is what I would do if I was back to square one and had just picked up my camera for the first time.
1 - Learn With Intention
Ultimately the fastest way to learn is to take a focused approach to practical filmmaking. This is what I did when I got my first camera in 2008 and is what I continued to do all throughout my time at college and university. Learning from tutors, textbooks and online videos are all well and good but it is up to you to put the effort into taking it a step further and practising the techniques in the real world.
Be honest with yourself and the level that you are at. Don’t think that because you watched a single video on a topic that you have mastered it. Constantly keep your eyes and ears open for new information on a topic, try it for yourself and repeat it until it becomes second nature.
Being purposeful with your spare time every week to learn and practice new techniques will make you grow faster than simply reading up on a topic.
2 - Search For Good Quality Sources
As I stated earlier, not every piece of information out there is created equal. Really put the time and effort into discovering sources of information and inspiration that are of excellent quality. If you want to learn how to become a better documentary filmmaker then watch documentaries of directors and DoP’s that inspire you. See if you can find and learn from them on social media, look to see if they sell a course on a personal website, watch with a critical eye how their framing, editing and pacing is done. Really immerse yourself in their work.
But not only that, immerse yourself in the work of the people that inspired them, and of others that inspire you. The more good quality sources of inspiration you have the larger your pool of knowledge and creativity will be. You will know you’ve found a great quality source when it stirs up something within you, an almost indescribable feeling that immediately resonates with you and motivates you to try something new. Never stop trying to find these sources as they will guide you through to discovering more about not only your own work but also about yourself.
3 - Ignore Current Trends
I cannot stress enough how important this point is. It is so easy to fall into a trap of seeing something cool and exciting that you want to immediately emulate it into your own work. Right now, there is a very common theme in YouTube videos to have ‘Cinematic Buttery Smooth Slow-Mo B-roll’ montages filled with transitions, whip pans and overly dramatic music. I understand the appeal of these segments in videos but they aren’t indicative of how real filmmakers approach their work.
Following trends immediately dates your work and makes it difficult for you to repurpose your films and videos for showreels or trying to draw prospective clients to hire you for work. It might be difficult to hear, but chasing likes and attention on social media by replicating a shot, transition or technique you saw on Instagram or YouTube won’t help you or your work in the long term. Recreating the work of other people and the trends you are seeing right now only serves to make your work get lost in the noise of everybody else doing the exact same thing.
4 - Choose Substance Over Style
This goes hand in hand with the previous point, but having a film or video with substance has so much more value to it than a collection of pretty shots. Once you are past the early learning stages of your filmmaking journey try to create work that has meaning, whether for yourself or for a wider audience. Flashy transitions and heavy colour grades will only take your work so far, but a story or video that has depth to it will strike a chord with people and make them care about your work.
That’s not, of course, to say you shouldn’t make your work look as good as possible. Capturing an audience’s attention in the first place will be important to make them stick around for the rest of the film. Style will dazzle your audience and bring them into your film, but substance will make them stay and hopefully make it a memorable experience for them. Find the balance between the two and make it work for you.
5 - Create Constantly
You have likely heard this so many times before, but it is probably the single most important piece of advice for anyone who wants to become a self-taught filmmaker. Learning by doing is the only way to fast-track your way to becoming a successful filmmaker. The more you fail in the beginning of your journey means you will have already built up the experience in how to tackle the obstacles and difficult situations that arise when working as a professional filmmaker.
Spending three years creating video after video, film after film will catapult you leagues ahead of a graduate who spent the same three years only learning from books and creating a single film at the end of their degree. Film theory, learning from tutors and reading movie scripts is great, but there is no substitute for hands-on, practical, knowledge that allows you to easily navigate your way through the world of filmmaking.
What Resources Are There To Diversify Your Filmmaking Knowledge?
To hopefully give you a head start on discovering what sources of inspiration resonate with you here is a list of filmmakers, photographers and general creatives that keep me motivated to try new things within my own work.
You will notice that I tend to stay away from content that sensationalises talking about camera equipment and focuses more on lighting, storytelling, behind the scenes or delving into the work of other photographers and filmmakers.
If you find that the inconsistency of knowing what topics a YouTuber will cover is slowing down the pace of your learning then I would highly recommend taking a look at websites like Masterclass and MZed that were created specifically for people who want to learn directly from professionals working in the industry. They are subscription-based resources however I can speak from personal experience when I say that the content on both of these websites is top tier and will teach you virtually anything you could want to know as a creative professional.
Just remember that regardless of if you decide to learn filmmaking through formal education or via self-study that there is no ‘correct’ way to become a professional filmmaker. The main deciding factor to your success as a freelance professional will be your own drive to grow and progress in your chosen field. You don’t need permission to become a filmmaker. It is up to you to decide the path you want to take and the direction you want your work to take you in.

How To Sync Audio And Video For Your Project
Have you ever watched a video where a person’s dialogue doesn’t match up with their actions? It’s really painful to watch. If audio is off by even a fraction of a second it can become so noticeable that it immediately breaks audience immersion in whatever they’re watching. So here’s three methods to help you avoid that problem!
Have you ever watched a video where a person’s dialogue doesn’t match up with their actions? It’s really painful to watch. If audio is off by even a fraction of a second it can become so noticeable that it immediately breaks audience immersion in whatever they’re watching.
But how does this happen? Surely you just have to hit record and everything works automatically, right? Well… not always. Depending on how you approach whatever you are filming, the audio can be recorded separately. This happens a lot on film and TV sets, for event coverage and even for YouTube content. It depends on the setup and the level of production.
Either way, you’re here for one thing, you need help syncing your audio and video! You’ll be glad to know you’ve come to the right place as I have three methods to help you out.
Before we go any further here are the three methods
Auto sync in Adobe Premiere Pro
Manual sync
Using Third Party Software
Chances are that one of these methods will fix up all of your unsynced clips! So let's get right into the solutions!
Auto Sync Video and Audio In Premiere Pro
To make this as easy and painless as possible for you, let's start with the most easy (and free) solution on the list, using Adobe Premiere Pro’s auto sync feature to align your audio and video.
1 - Begin by adding the video and audio clips that you want to sync up onto your timeline. If you have multiple video and audio clips then separate each of them onto its own track layer
2 - Highlight all of the clips on the timelines, right click and hit synchronise
3 - Make sure that the synchronise point is set to ‘Audio’, hit OK and allow Premiere Pro to work it’s magic!
If everything has worked out properly, all of your clips should now be synced up. If it didn’t work as you had planned then you may need to fine tune it by using the next method.
Manually Syncing Video and Audio
If Premiere’s auto sync function lets you down then it’s time to go old school. Be prepared to do a LOT of fiddling around with this method. Hopefully when you began filming you either used a start or end slate on your clips to get the audible ‘clack’ of the clapper. If you didn’t, then you will need to pay attention to the mouths of your talent, or any other noticeable audio cue to try and sync to.
1 - Begin by looking at the waveform of your audio on your footage and audio clips. Try and move them as close as possible to synchronise them. Look for large noticeable spikes like a clap from the talent, a start or end slate, or distinct words or sounds from your subject.
2 - Once you are close to syncing your clips you may need to finesse it by right clicking the timeline numbers and ticking the ‘Show Audio Time Units’. This will allow you to move clips by microseconds instead of frame by frame to really hone in on the most accurate sync.

This method is much more involved and can take hours if you’re unlucky enough to not have any distinctive sounds to match up with. If you’re trying to sync up footage of someone talking then try and listen for words that have strong plosive sounds. Words that begin with the letters p, t, k, b, d, and g (like pet, dog, touch, etc) are great words to listen out for as they not only sound distinctive but also have associated mouth shapes that you can look for in the footage too.
Using Third Party Syncing Software
If you haven’t had any luck using Premiere Pro to auto sync your clips and doing it all manually is taking far too long then it might be time to look elsewhere for your solution. Enter Red Giant’s audio and video syncing software, PluralEyes.
This is where I almost exclusively sync up my footage and audio clips these days as it is incredibly easy and very reliable. Even for short clips that Premiere would struggle to sync up. It does cost a pretty penny though, so I would only recommend getting this if you’re really stuck with syncing up your footage or you plan on having a lot more shoots in the future that will require you to do so.
1 - Organise your footage and audio into folders using your file explorer. Each folder will be a different track in Premiere after you import it
2 - Drag and drop your folders into PluralEyes. Wait for it to analyse it all.
3 - Push ‘Synchronize’ and watch the magic unfold
4 - Choose export timeline and save it as a Premiere Pro XML
5 - Open Premiere Pro and import the XML file. It will import all of the footage, audio and the synchronised timeline!


Best Camera Bags In 2021 - Bags to carry your camera equipment for every budget
Finding yourself with too much camera equipment and not enough hands to carry it all? Then what you need is a top-notch camera bag to keep it all in! There are hundreds of bags on the market to look at, each with varying styles, sizing and uses. You can be 100% sure that the perfect camera bag for you is out there somewhere!
Finding yourself with too much camera equipment and not enough hands to carry it all? Then what you need is a top-notch camera bag to keep it all in! There are hundreds of bags on the market to look at, each with varying styles, sizing and uses. You can be 100% sure that the perfect camera bag for you is out there somewhere!
With so much choice though it can be hard to come to a decision. So we’re here to help you narrow your list down with our top picks for camera bags in 2021!
best camera bags in 2021:

Yuhan DSLR Backpack
Best for beginners

Peter McKinnon x Nomatic Backpack
Best for travel

Lowepro ProTactic 450AW II
Best for professionals

Peak Design Everyday Backpack
Best for versatility

ThinkTank Retrospective v7
Best for weddings

Duragadget Backpack
Best budget camera bag

Lowepro Powder Backpack 500AW
Best for adventure
If you are looking for a more detailed analysis on why I chose these camera bags as the best to use in 2021 then keep on reading!
There are a lot of different aspects to consider when buying a bag. Your style of shooting, how much equipment you have, and your lifestyle will all play a part in making your choice. To be perfectly honest, there is no such thing as a perfect ‘one size fits all’ solution when it comes to camera bags as everyone has their own tastes and personal needs when it comes to choosing a camera bag. That said though, I think some of these bags are as close to perfect as they can be! At least they are for me anyway!
As you’ve seen already, I have tried to cover a multitude of different styles, professions and needs with the list above so let’s jump right into why I think these bags are perfect for their niches.
Best Camera Bags In 2021
Yuhan DSLR Backpack
This canvas backpack is in my opinion a fantastic starting point for any beginner photographer or filmmaker. It’s lightweight, fairly durable and crucially has two different main compartments built into the bag. The bottom half for your camera gear and the top half for everything else.
Why is this so important? Well, it means you’re able to easily access your camera gear while still being able to bring along other important items like food, lightweight raincoats or anything else you might need!
There are also straps on the bottom of the bag to attach a small tripod or gimbal to.
The drawbacks of this bag are that the construction of it means that your equipment probably will begin to cause strain on the seams as you upgrade over time. Professional lenses and cameras weigh more than ones aimed at beginners and hobbyists so this camera bag may not provide all the protection that you would like for higher end systems.
However, as a beginner, this bag will encourage you to be able to bring your camera plus an extra lens or two, along with whatever else you might need for a daytrip, light hike or a short shooting session. Being able to bring more than just your camera equipment will make every shoot you have more enjoyable, and the more fun you have the more likely you are to keep practicing and learning!
If I were starting out from scratch then this would be the bag I would get without any hesitation.
Best for beginners
Yuhan DSLR Backpack
Peter McKinnon x Nomatic Backpack
If you don’t know who the Youtube sensation Peter McKinnon is then I HIGHLY recommend that you check out his channel. He’s the perfect blend of entertainment, fun and knowledge. But this isn’t about Peter, this is about the bag that he created alongside camera bag manufacturer, Nomatic.
Just as with the previous backpack, this one has two main compartments, however, it is split into a front side and a back side. This kind of design is absolutely amazing for two reasons. First, it means that you can fit larger and heavier camera gear into your bag, and secondly, it keeps your camera equipment safe from damage, dirt and even makes it more secure as the camera compartment opens from the back.
This bag was designed with world travellers, YouTubers and professionals in mind as it ticks almost every box you could possibly want. There is more than enough room for all your equipment, the front facing compartment is perfect for storing and compressing additional clothing into, the build quality is fantastic and there are side zips to help you get to the gear you need quickly. For me, this camera bag is as close to perfection as it can get.
The downside? It’s pretty pricey, almost always out of stock, and there are a lot of other neat additional extra features that don’t come with the bag as standard so you’ll have to pay extra for those… If you are serious about becoming a professional photographer, YouTuber or filmmaker though then I reckon it’s worth investing in this bag.
Best for travel
Peter McKinnon x Nomatic Backpack
Lowepro ProTactic 450AW II
When it comes to fully protecting your camera gear you genuinely can’t go wrong with this bag. The Lowepro ProTactic 450AW II (that’s such a mouthful) is tough, built like a tank and is the perfect size to bring along to almost every kind of professional shoot you might have. The internal dividers of the bag are very easy to move around and reconfigure to whatever layout works best for your equipment.
The camera bag opens from the back, perfect for keeping your gear extra safe and making sure you don’t get the straps and back of the bag dirty when you access it. It also can store small, easy to access things in the side panels of the bag. The ‘webbing’ on the front of the bag is also perfect for modifying and attaching tripods, gimbals or anything else you might need to it.
I own the older version of this camera bag and it has lasted me well over 5 years of constant use. It’s been brought into busy cities, lugged up the sides of mountains and has been squeezed into more overhead cabin bins than I can count. And throughout all that it has kept my camera and lenses safe, dry and damage free. It’s about as purely functional as a camera bag gets!
Best for professionals
LowePro ProTactic 450AW II
Peak Design Everyday Backpack
This bag is probably my most used bag of all time. It is almost perfectly designed for the way that I shoot when I am working on personal projects, travelling for fun or off on a daytrip. The Peak Design Everyday Backpack comes in two sizes, a 20L size and a 30L size. I opted for the smaller 20L size to force myself to carry less equipment and become more creative with the limitations of not having all of my equipment at hand, and I’m glad to say it worked perfectly for me!
It may seem strange at first but the layout of this camera bag means that you don’t have access to everything all at once by opening one compartment. The access points are at the top and at both sides of the bag, meaning you have to decide what equipment is important to have at hand and place it near those openings. It takes a little getting used to but it makes accessing your equipment much faster when you can swing the bag off your shoulder, open the magnetic lock or unzip a side and immediately grab what you wanted.
This small, strange bag is honestly one of the best designed and durable backpacks on the market right now and it can be used for a multitude of different things. As I’ve said, this bag is almost perfect for my personal needs and has been able to put up with everything I’ve thrown at it so far, including protecting my camera equipment when I wipe out while skiing!
Best for versatility
Peak Design Everyday Backpack
ThinkTank Retrospective V7
When it comes to weddings it’s not really practical or comfortable to use a backpack to store your equipment. When you’re shooting in a fast paced, live environment like a wedding you only have seconds to react to capture what could be a beautiful moment. As such, we’re changing from backpacks to a shoulder bag for this one!
Any wedding photographer or filmmaker will know how important it is to have their gear with them at all times. It is literally the difference between getting a shot or not. So that’s where the Think Tank Retrospective 30 comes in. This canvas style shoulder bag has a deceptively large amount of room for a bag that goes over your shoulder. It works better with mirrorless cameras as you can fit more bodies with a lens in however there’s still plenty of space for DSLR users too!
Aside from the main compartment where the cameras and lenses live, there are also plenty of other pockets and compartment for storing batteries, camera card cases, audio equipment, flashes and there’s even room for a laptop!
While you probably will still want to fit more stuff into your bag (I know I always want to have more with me on a wedding day) the Think Tank really does strike a good balance between bringing what you need and still giving you room for all those little extras.
best for weddings
Thinktank Retrospective V7
Duragadget Backpack
If you have looked at all of the other camera bags on this list and despaired at the price then don’t worry, I have you covered. This camera backpack is perfect for beginners and hobbyists on a strict budget!
The Duragadget camera bag is a great, cheap alternative to spending big money on camera bags while you’re still finding your feet with photography and filmmaking.
As with pro level camera bags, you are able to move the internal dividers to fit and accommodate all of your camera gear so you can keep rearranging them as your collection of lenses and cameras grow! There are mesh pockets and additional zipped compartments for holding your batteries, accessories and anything else you might need, as well as adjustable straps to attach a small tripod to.
When I started out I bought a bag very similar to this one and it served me well until I began upgrading my equipment and the bag began to strain under the additional weight. As such, I would only recommend this camera bag for beginners or those who don’t plan on expanding their arsenal of camera equipment any time soon as you will likely outgrow this camera bag very quickly. Between this and the Yuhan DSLR Backpack I would choose the Yuhan as it will likely last you longer and be a much more fun bag to use.

best budget camera bag
Duragadget Camera Backpack
Lowepro Powder Backpack 500AW
If you are planning on taking things to the absolute extreme then all of the bags I’ve mentioned before won’t even come close to cutting it for what you need. If you hear the mountains calling to you and you know that you want to pack your bag, leave your house, hike for several days and come home with pictures most photographers can only ever dream of then you’re going to need a specialised bag to keep up with the demands.
The Lowepro Powder Backpack 500AW is probably one of the most specialised bags on the market right now as it’s aimed at mountain lovers, particularly those who do off-piste snowboarding and skiing.
Rather than think of this as a traditional camera bag you will probably want to look at it as primarily a bag for multi day hikes, with loads of room for your food, clothes, straps for attaching heavy external equipment to, with a few camera bag-like features thrown into the mix.
I own a similar, now discontinued, brand of bag and I can honestly say that having a reliable, spacious bag that puts hiking and adventure first and photography and filmmaking second will be essential in making your big adventures more comfortable and enjoyable.
Every adventure is different so only you will be able to make the best call on what you should be packing but the Powder Backpack is designed so that 50% of the space can be used for non-camera related items. As well as being able to remove the camera compartment entirely should you decide to use it as it’s own hiking bag. It offers back panel access to quickly grab your camera rather than having to unload your entire bag to get to your equipment.
Overall I think this is one of the best adventure camera bags on the market right now.

best for adventure
LowePro Powder Backpack 500AW
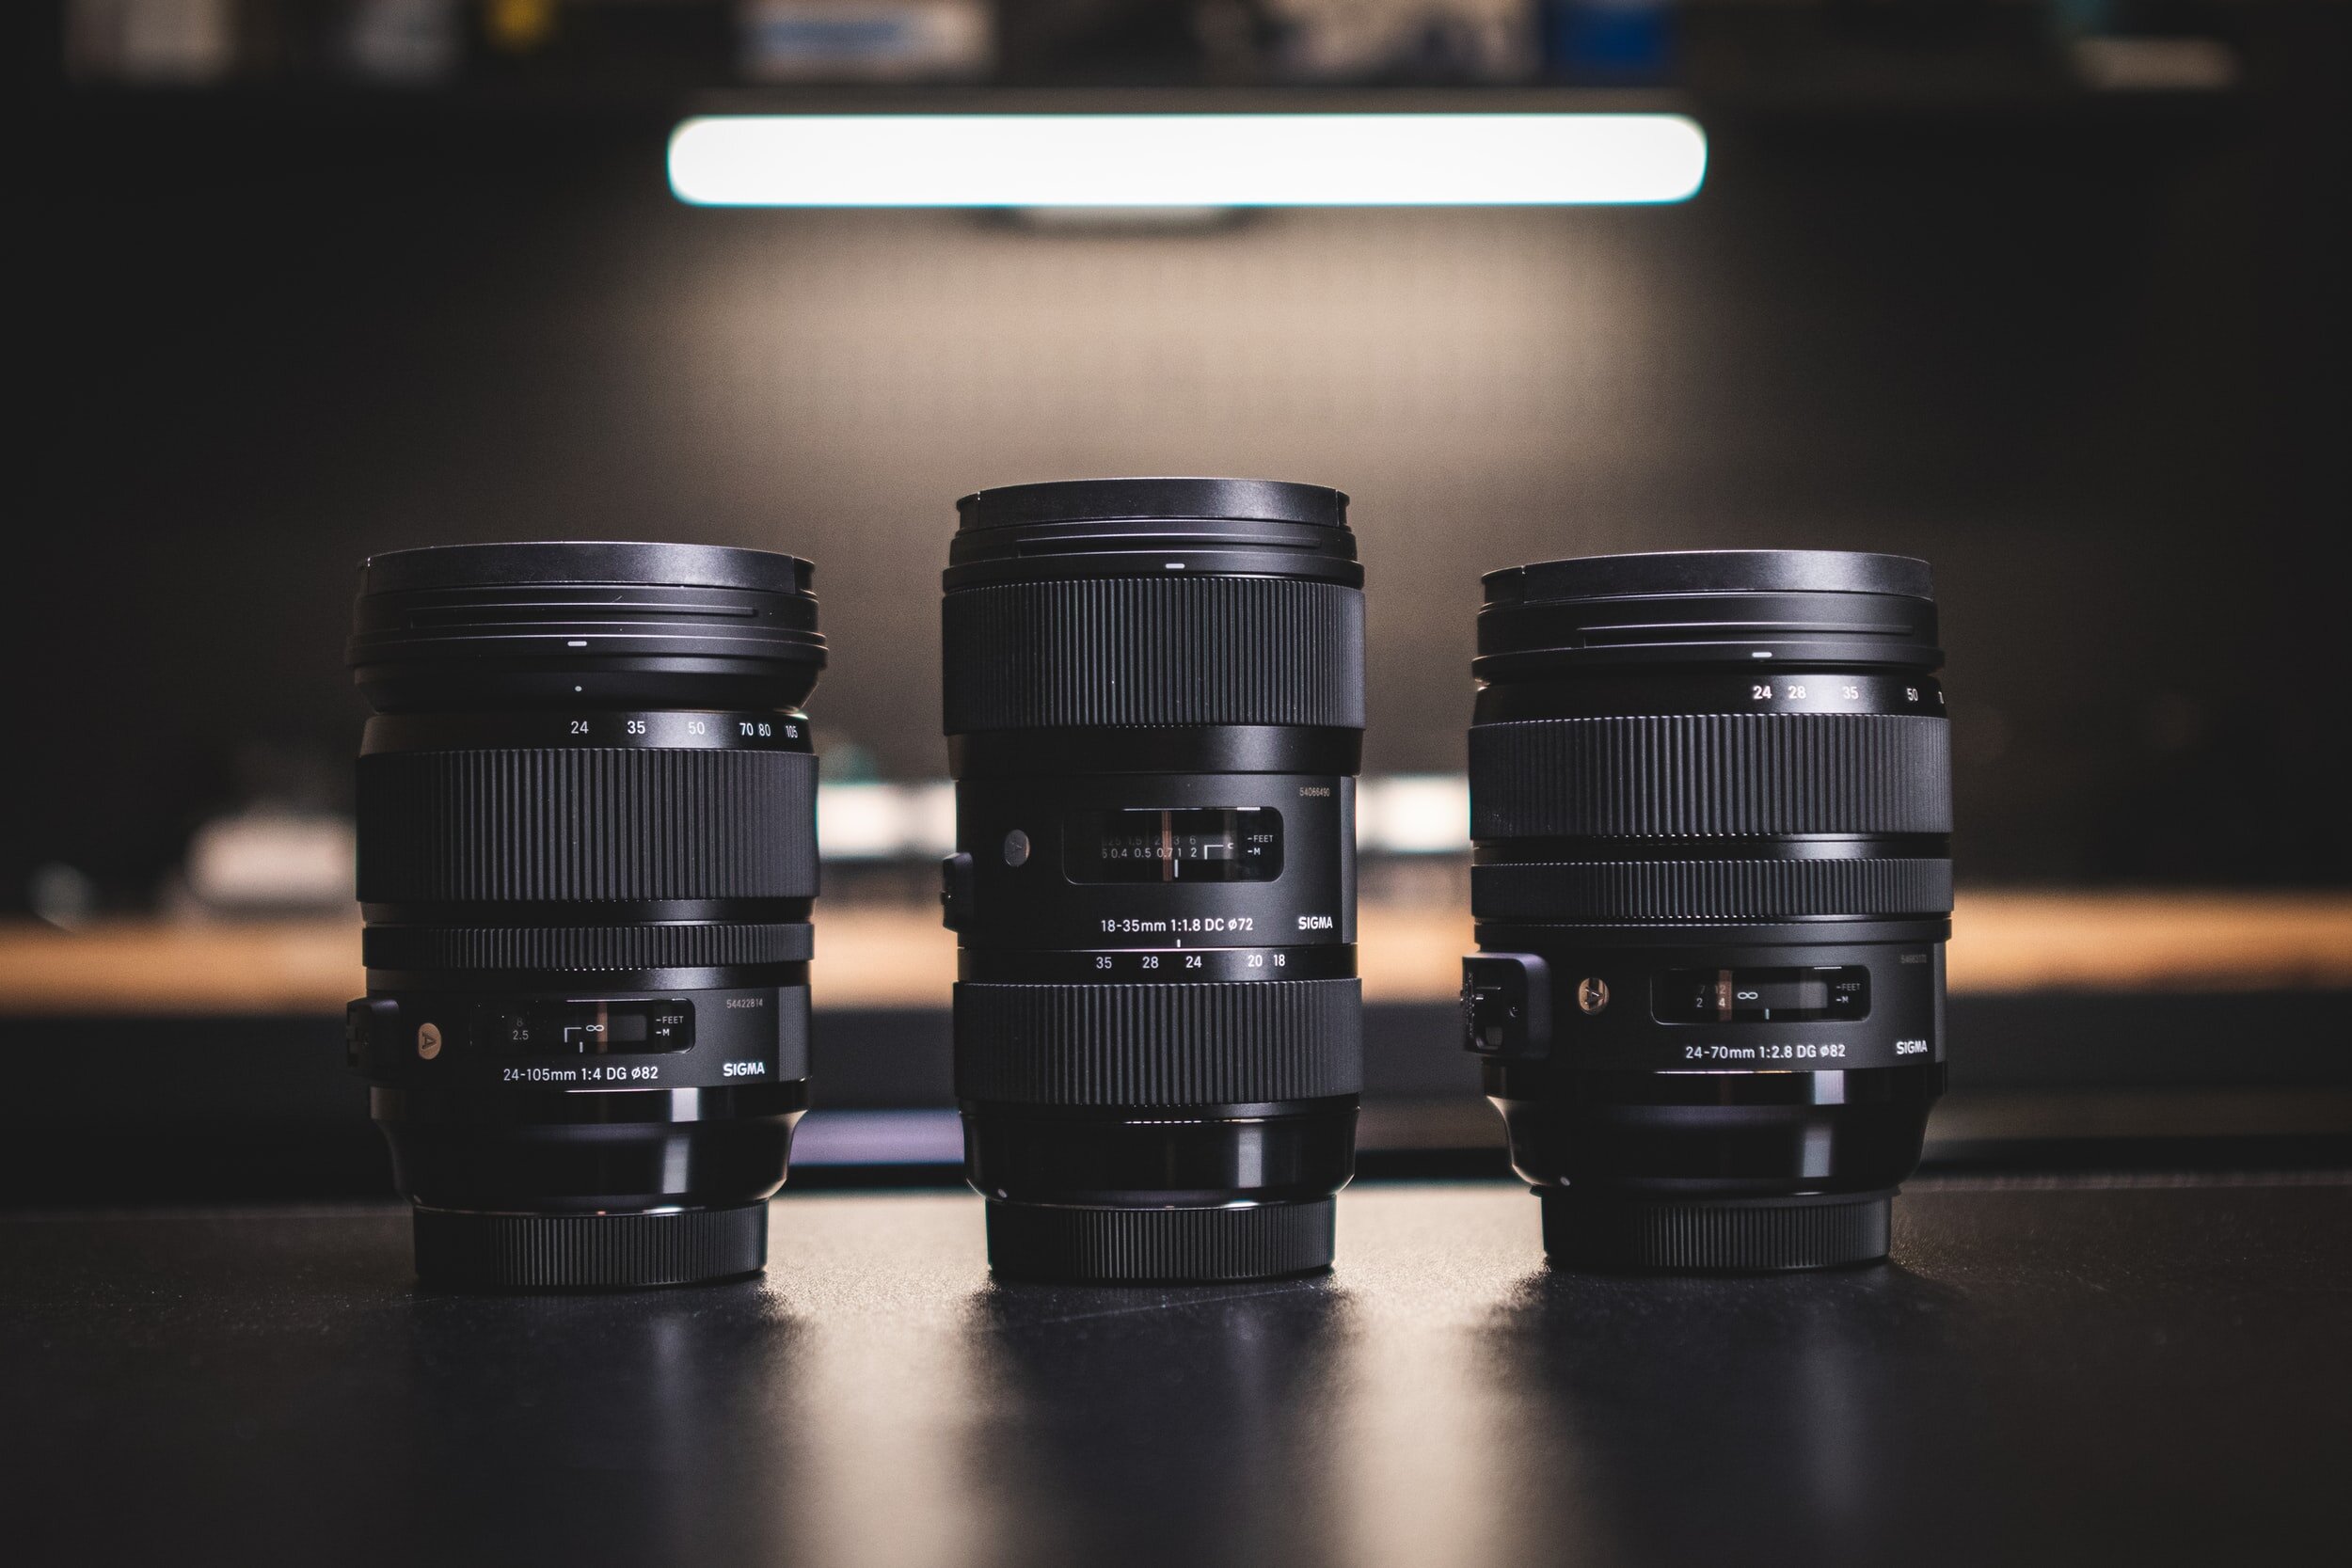
The Beginner’s Guide To Buying Your Next Lens
There’s a lot to cover when it comes to choosing a new lens, so I am here to help you navigate the potential minefield of creative and technical uses of the lenses you will be looking at.
Getting started into photography and filmmaking is such an exciting time. There’s so much to learn and so many new techniques to try. It actually makes me a little envious that I can’t get the chance to go back and re-experience all of that excitement again!
After you decide which camera is best for you as a beginner you will learn and grow with every photo and video you take. Like all art forms, it’s something that can’t be rushed. Take the time to really learn how your camera works and what you love to shoot.
But I’m assuming you already know this! After all, why else would you be reading a guide on buying a new lens?
Before we go any further though I need you to ask yourself one very important question. Why do you want a new lens?
If you just want one because it’s something shiny and new then stop right there and save yourself the money. Buying a lens just for the sake of it will likely end up with you not using it and you won’t get the most out of it.
Discover your ‘why’ first before you rush off and buy a lens you may not be totally happy with.
Knowing what you want to shoot and how you want to go about it is so important. You should only be buying a new lens when your current one is forcing you to compromise or preventing you from getting the shot you want.
There’s a lot to cover when it comes to choosing a new lens, so I am here to help you navigate the potential minefield of creative and technical uses of the lenses you will be looking at.
These are things that are universal to every lens, regardless of the manufacturer or brand. So despite me talking about Canon cameras and lenses all of this information still applies!
The Technical Part
This is possibly the least exciting part of shopping for a new lens, but it is absolutely essential that you understand what it is you’re looking at. Not knowing the sometimes strange technical jargon that’s printed on the side of a lens can leave you with a lens that is useless for your specific camera.
Get the right fit
First and possibly most importantly is to look for the type of mount that your current camera and lens have. Most camera brands have multiple types of lenses designed to fit on different types of cameras, and with the fairly recent rise in popularity of mirrorless cameras, there are more fittings than there were before to deal with.
For instance, if you have a Canon 250D camera that uses an EF-S type mount you can use both EF-S and EF lenses on your camera body. However, if you are using a Canon 5D mkIV you can’t use the EF-S lenses on it. This is to do with how the lenses project the image onto the camera sensors. I won’t go super detailed about it, but basically all you need to know is that it’s important to check the mount type of the lens and the mount fitting of your camera before anything else so that you’re not buying a lens that is useless for your system.
There is usually plenty of documentation about this from your camera manufacturer’s website, but if you’re still not 100% certain it is always a good idea to ask someone who knows their way around a camera. Bonus points if it’s someone who already owns the lens or camera you currently have!
Weight
This is definitely the least sexy thing to be talking about when it comes to lenses, but trust me it makes a difference! It sounds obvious but lenses are really nothing more than a lump of metal, plastic and glass. As a beginner choosing a lens that isn’t too big and bulky and that still fits in your camera bag can make the difference between bringing it with you on a shoot or constantly leaving it behind to save carrying the weight.
If you plan on shooting things at home or in a studio then maybe the weight and size of a lens won’t make much of a difference to you, but for those who want to get into events, wildlife or travel photography then the novelty of carrying around brand new, but really heavy, equipment for hours on end wears off really quickly.
The only advice I have here is just to be conscious of what you want to shoot and try and pick your lens weight accordingly!
Zooms VS Primes
The final technical aspect you will want to consider for your new lens is on if you want to choose a zoom or a prime lens. Right now you most likely have a zoom lens that came with your camera. They are incredibly versatile and give you a lot of creative options when it comes to deciding how wide or tight you want a shot to be.
Prime lenses on the other hand are at one constant focal length. This means that if you want to have a close up of a subject you won’t be able to zoom with your lens and you will have to close the gap between you and your subject by moving closer.
Again there are a lot of creative uses for both of these types of lenses which I will go over soon, but the main thing to note is that a zoom will cover more focal lengths than a prime lens. This means you can react to shots faster, keep your kit lighter and readjust shots without needing to change lenses.
On the flip side though a zoom lens usually doesn’t have as wide an aperture as a prime lens meaning you will have less light available for shooting in low light situations as well as not being able to work at very shallow depths of field.
Knowing the type of images you want to capture will be the main deciding factor in choosing a zoom or a prime lens.
The Creative Part
Here is where things start getting exciting! This is the part where you can start to really figure out what kind of lens will best suit your needs. Knowing what you want to shoot in a creative way will shape the kind of choices you’ll be making as you build up your collection of lenses.
Get the right focal length
But what is focal length? To put it simply, it’s the field of view of a lens. Basically how much ‘stuff’ you can see within your frame.
In general, wide-angle lenses are considered to be anything under the 35mm mark whereas telephoto lenses are considered to be anything above the 70mm mark. Everything in between can be considered to be a ‘normal’ field of view. So this means a wide-angle lens will fit more into your frame than a telephoto lens does, but both have their creative uses!
Wide-angle lenses are usually the go-to choice for people who work in tight spaces, shoot landscapes or want to really exaggerate something. They’re a favourite of sports photographers who can get close to the action, landscape photographers who want to show huge vistas and people who gravitate towards architecture and homestyle photography.
You can absolutely take portraits on these lenses but due to the nature of the lens, it will exaggerate the size of anything near the lens, creating really unique portraits!
On the subject of portraits, many photographers love to use a 50mm or an 85mm lens to convey a sense of beauty to their portraits. These focal lengths, particularly the 50mm, are seen as the most ‘true to life’ lenses as they don’t exaggerate or compress facial features like other lenses do, while still being able to nicely isolate the subject from the background.
These lenses are very versatile for people who are into shooting lifestyle imagery, weddings and anything else that requires a down-to-earth, comfy kind of feel.
Telephoto lenses really come into their own above the 100mm focal length. When working at such high focal lengths you will really begin to see the effects of lens compression in your image. Len compression is simply the background of your image appearing larger and more ‘distorted’ than it is in real life compared to your foreground subject. The higher your focal length the bigger the background elements appear.
This might sound scary at first but it is actually a good thing, especially for wildlife and landscape photographers as it can be used to make the subject the main focus of the image.
Choosing the right focal length for you will really depend on what you want to shoot but to break it into what focal range works best for what type of photography you can use this as a cheat sheet.
Wide-angle - sports, landscapes, architecture, real estate
‘Normal’ range - portraits, weddings, lifestyle, food
Telephoto - sports, landscapes, wildlife, events
These aren’t necessarily rules to follow as you can use any lens to shoot almost any type of photography but it will give you the best starting point to work from to find what works for you!
Why your aperture matters
Next up, you will want to check the widest aperture of the lens you want to buy. This is the number beside the letter f that should be written on the lens somewhere, usually written as f/2.8 or f/3.5-5.6.
These ‘f numbers’ tell you exactly how much light the lens will allow onto the sensor of the camera and make your image brighter at its widest setting. If you’ve ever looked into your lens when changing the aperture on your camera you will notice the metal blades moving inside it.
This is important for a number of reasons. First being that the lower the f number on the lens, the more the blades can open and more light can enter the camera allowing you to shoot in low light situations.
Secondly, it affects your depth of field. Or put more simply, it can make your background and foreground look more blurred out!
The lower the aperture of a lens the more background blur you can achieve with that lens when you open it the whole way up. Doing this is called shooting with a ‘wide’ or ‘fast’ aperture, giving a shallower depth of field, whereas shooting with the lens stopped the whole way down at a ‘narrow’ or ‘slow’ aperture will give a deep depth of field, meaning more of the image is in focus.
So why does this matter for your creativity? Well, shooting at fast or slow apertures really depends on personal taste and the story you are trying to convey with your image. As an example, a portrait photographer might choose to shoot with a really fast aperture of say f/1.4 on an 85mm lens as it will give incredible separation between the subject and the background elements. The plane of focus will be solely on the subject and the background will have a beautiful blurred look to it.
On the other hand, a landscape photographer might choose to shoot at f/22 on a 24mm focal length to make sure that the image is in focus from the front to the back of the image. It all depends on the subject and the message you want to convey.
As a general rule of thumb, lenses with lower apertures are heavier and will cost more money. The best example of this is with Canon’s range of 50mm lenses. You can pick up a Canon 50mm f/1.8 for as little as £120, with the next step up in the range, the Canon 50mm f/1.4 at around £340. And then if you want to go all out and get the pro-level Canon EF 50mm f/1.2 it will set you back close to £1500. As you move up the range you’ll notice that the lenses get bigger and bulkier and that the price tag increases as the aperture decreases.
What this means for you is that if you know that you only want to shoot landscapes and have no interest in portraits or low light photography you may choose to save yourself some extra money by opting for a lens with a higher ‘fastest’ aperture. And vice versa, if you know you will be mostly taking portraits in low light situations then you may want to choose a lens with a low aperture to get the most out of the available light.
As you can see there is a lot of information to take in and a lot of decisions to make before choosing your next lens. It might seem quite daunting, but knowing exactly what you want to shoot before you buy a lens will save you money in the long run.
Other things to consider when choosing your lens will be things like do you want a lens with image stabilisation? Should you spend extra money on a more expensive lens if you’re planning on going professional? How about specialist lenses like macros for larger than life shots, or tilt-shift lenses for architectural imagery?
Ultimately it all comes down to your own personal preference in what you want to shoot and how you want to tell the story of that image.
If you’re still unsure of purchasing a lens that you have your eye on then the best thing to do is to simply not buy it. Find more reviews on a lens or ask someone whose opinion you know you can trust and rely on. The internet is filled with people who leave positive reviews on products they received for free, so you can never truly know what information is good or bad.
Always be skeptical of what you see and read on a new product until you can verify how good it actually is. Brands know the power of influencer marketing and will use it to hype up a product to get it to sell fast.
Get your research on any purchase from more than one place, especially if that place is the reviews section on the website you are buying it from. The staff in independent local camera stores will be able to give you an insight into how a lens can be used, or if you want to do your research from your armchair then look at websites like DP Review and The Digital Picture are great resources. They are huge hubs of information with very active and knowledgeable communities so you will be sure to learn something of value there!
Choosing your next lens can feel like a big decision, but hopefully after reading all of this information it doesn’t seem like such a hard task anymore! Discover your why, lean into unlocking new levels of creativity and enjoy the process of learning all about your new lens!
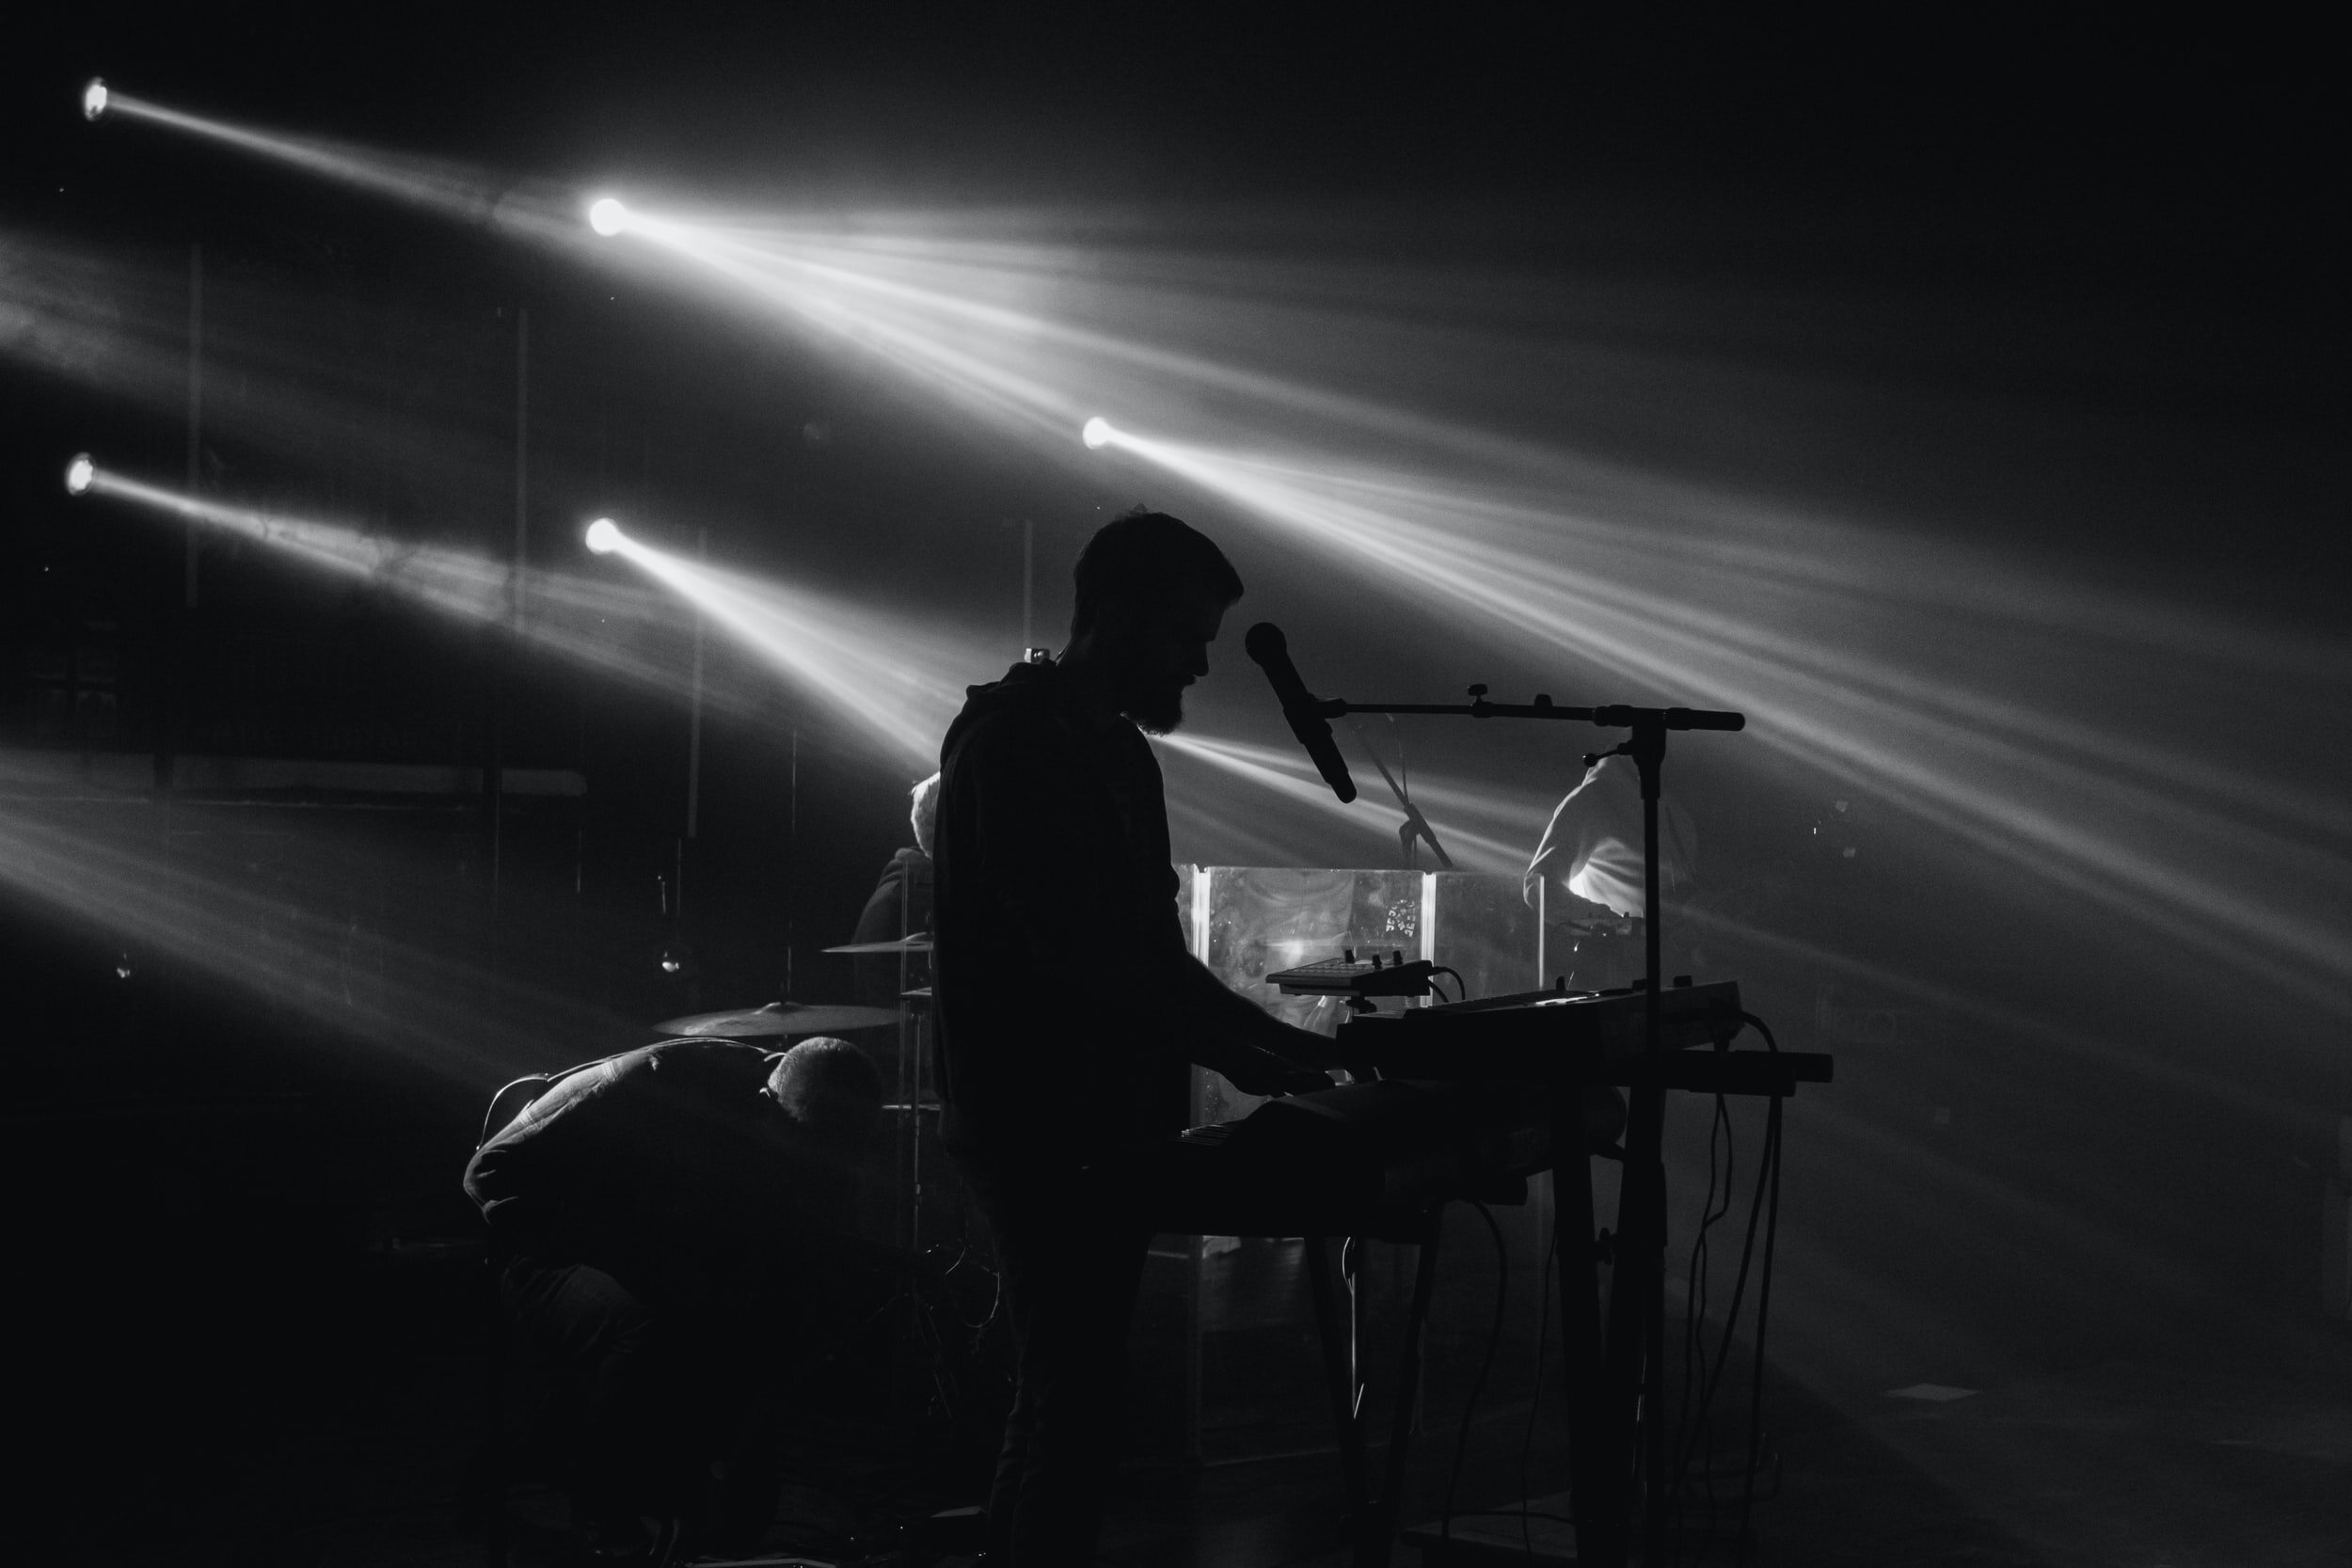
The Best Lightweight Lighting Kits For Self Shooters
Lighting is hands down one of the single most important factors in creating a great looking image. And that’s true across all styles of filmmaking and video production. Whether you are working on high-end film and TV sets, creating a promo video for a new product, or even making a short funny video to post to social media, lighting can drastically change the look and feel of what you’re creating.
Lighting is hands down one of the single most important factors in creating a great looking image. And that’s true across all styles of filmmaking and video production. Whether you are working on high-end film and TV sets, creating a promo video for a new product, or even making a short funny video to post to social media, lighting can drastically change the look and feel of what you’re creating.
Good lighting can highlight or mask details from your image and with good lighting, you can even get amazing results from lower end, consumer-focused camera sensors.
Choosing the right lighting for any job will become an essential part of working on any project as a filmmaker, and it’s even more important if like me you’re a self-shooter who wears more than one metaphorical hat at a time!
Having lighting that you can rely on and is easy to carry, as well as fast to set up, will make every shoot you work on a far more enjoyable experience. Not having to stress about being near a power source or having to worry about which piece of equipment to leave behind will save you time on set and speed up your workflow whenever you need it most!
So here are my top choices for lightweight lighting kits that I personally love!
best lightweight lighting kits in 2021:
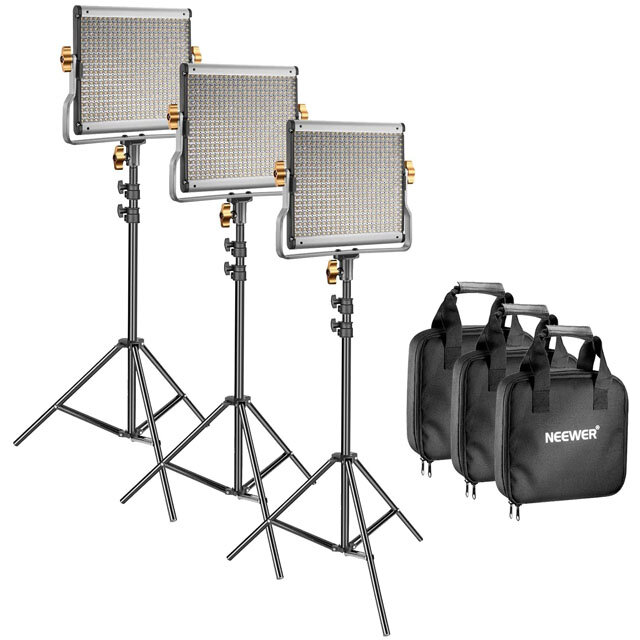
Neewer Dimmable Bi-colour 480 LED Light Kit
Pros -
Affordable, great value, very portable
Cons -
Loses colour accuracy when dimmed, not as bright as other systems

GVM 800D RGB Video Light Led Panel Light
Pros -
Good light output for size and price, full RGB lighting
Cons -
App for making adjustments can be confusing, light stands are flimsy

Falconeyes RX-18T Roll-Flex LED Video Light
Pros -
Flat and flexible, can be mounted into tight spaces regular lights can’t fit
Cons -
Difficult to use with additional lighting modifiers

Godox S30 Focusing LED Spotlight 5600K
Pros -
Fantastic output and colour accuracy
Cons -
Lights of this size have limited uses but they do what they are designed to do very well

LUXCEO Q508A LED Light Wand
Pros -
Versatile, bright and very affordable
Cons -
Not fully RGB, no battery indication

Aputure AL-M9 Amaran LED Video Light
Pros -
Very portable, great quality, very bright for its size
Cons -
Battery life could be better

Aputure AL-MX Mini LED Video Light 2800K-6500K
Pros -
Variable colour temperature, great output
Cons -
Heavier than AL-M9, battery life could be better
Best Video Lighting Kits 2021
1 - Neewer Dimmable Bi-colour 480 LED Light Kit
For years now Neewer has been producing cheap, readily available products for pretty much every aspect of film and photography. I have plenty of their equipment and can say that you definitely get incredible quality for what you pay when it comes to their gear. While I haven’t used these exact lights on a shoot in a while I can almost guarantee you won’t be disappointed in picking a set up and using them on your next shoot.
They are very easy to power up, either with mains electricity or by using readily available Sony NP-F batteries directly on the back of each panel. With them being bi-colour you can easily switch the white balance between daylight and tungsten to match the lighting you find yourself working with.
I’ve found that once dimmed the lights lose a little of their colour accuracy but that is a small drawback compared to the price and portability of these lights.
Best budget lighting kit
Neewer Bi-Colour Light Panels
2 - GVM 800D RGB Video Light Led Panel Light
Lights like these provide an absolutely incredible level of versatility when lighting a scene. The ability to not only make changes to your white balance super quickly but also to be able to tap into the full spectrum of RGB lighting can give you a lot of options to light a scene creatively.
These light panels are easy to bring along to any set, can be powered by mains or battery and can quickly be adjusted via an app on your phone. No more having to get up and walk backwards and forwards checking your changes in camera!
The panels are large enough to give good shape to your subject, but if you want to have a softer look you will still need to add some form of lighting modifier. Using a sheet of diffusion or bouncing the light off a nearby white surface should be enough to soften it enough for your needs.
Overall, the versatility of these lights is absolutely incredible and I would highly recommend them to anyone considering creative documentary-style work!
Best value led lighting kit
GVM 800D RGB LED Panel Lights
3 - Falconeyes RX-18T Roll-Flex LED Video Light
This light is absolutely mind-blowing in what it is capable of. Granted it is a much more niche light than the others so far, but it is no less amazing for it.
Sporting the ability to bend around itself this light can fit into almost any space. It’s perfect for filming in tight interiors, mounting onto a ceiling, or even inside a lampshade!!
Being bi-colour and dimmable gives you the flexibility you need to make the most out of this light without needing any gels or bulky external dimmer packs.
Admittedly this flexible panel light might not have a place in your kit, but if you regularly find yourself working on creative short films or more conceptual films then this light is definitely worth considering. Being able to hide and mount it almost anywhere is an invaluable asset, plus the ability to literally wrap the light around your subject gives incredible results!
most versatile led light
Falconeyes RX18TD Bi-Colour Flexible LED Panel
4 - Godox S30 Focusing LED Spotlight 5600K
Spotlights like this one are often overlooked by many filmmakers as they would rather opt for a much larger and softer source of light. I personally think spotlights like this one are a necessity for anyone who shoots and produces their own content. Smaller lights like the Godox S30 are perfect for adding shape to a subject by either side or backlighting them, resulting in beautiful hair and rim lighting.
The internal focusing lens in this spotlight allows you to either flood the room with light or create a hard, defined circle of light for your needs. There are also lighting modifiers designed for this style of light so if you feel like the light is too harsh there are easy ways to soften it too.
The Godox S30 is set to a daylight balanced light which initially may seem like a drawback, but for a light of this size, it is very easy to add a gel to it in order to warm it up to a tungsten look if you need. However, when you consider that a light like this is perfect for lighting dark wedding receptions or adding shape to a subject then the ‘drawbacks’ don’t seem that major at all.
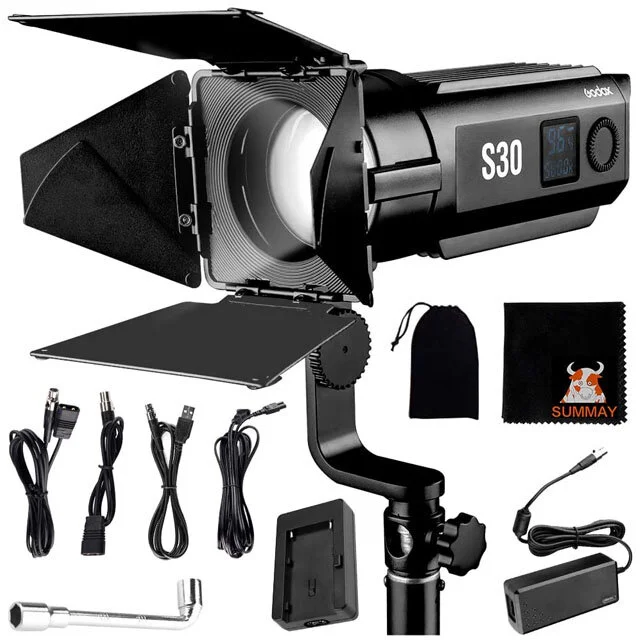
Best spotlight led
Godox S30 Focusing Spotlight
5 - LUXCEO Q508A LED Light Wand
Originally I used to think light wands like this were just a gimmick that photographers used to do light paintings with. After getting the chance to use on in a professional setting though I quickly changed my mind. You see, light wands are an incredibly effective (and much cheaper) alternative to purchasing vertical strip light modifiers which give great directional lighting.
The Luxeco Q508A may not be the most comprehensive and feature-rich light wand on the market but what it lacks in dialling in full RGB colour values it makes up for with its ease of use and versatility. This light is perfect for adding a strip of light to the side of a face, adding shape to a product, adding a splash of colour to a background, or moving across a small scene for very dynamic lighting
.It’s not an essential part for a lighting kit but it will absolutely unlock a new level of creativity for you potential setups.
best value light wand
Luxeco Q508A Light Wand
6 - Aputure AL-M9 + AL-MX Mini LED Card Lights
Aputure is probably my favourite brand for LED filmmaking lights. They are always innovating and always listening to what their customers want from their lighting kits. That’s why I can comfortably recommend both of these tiny, yet mighty palm-sized lights. Yes, that’s right, palm-sized.
I picked up the Aputure AL-M9 to help add a small splash of light to the background of some interview scenes, but that’s not all it can be used for. The size of both of these card lights means they can be placed almost anywhere a regular light can’t.
For such a small source of light, they pack such a punch that it is very easy to use them to light night scenes, use as a small fill light, or even to add a splash of light to the edge of a subject.
So why do I recommend both? Well, they are almost the same product but with the difference of the AL-M9 being a constant daylight white balance, whereas the AL-MX is bi-colour. If it came to it I would choose the older M9 over the MX purely because it’s smaller and lighter, however at this size I think both of these lights are something that belongs in every filmmaker’s camera bag.
best budget led card light
Aputure AL-M9 Amaran LED Video Light
most versatile led card light
Aputure AL-MX Mini LED Video Light 2800K-6500K

It's Time To Begin Diversifying Your Creative Skillset
The creative industries are moving so fast that now, more than ever before, it is so important to begin diversifying our creative skillset.
Immediately after graduating university in 2014 and becoming a professional videographer, I removed the safety net of my part-time retail job to force myself to make my exciting new career as a self-employed filmmaker work. I had never felt so free! I was my own boss and I could set my own hours, this was everything I had ever wanted!
That was until I realised that I didn’t know what I wanted to do. What path would I take to begin taking on paid work? What was I going to specialise in to start paying myself a wage?
This will likely be something that every professional in any creative industry will have felt when they began their career. Having specialist knowledge on something can really catapult you leagues ahead from the many other freelancers who are trying to get into the same positions and jobs as you.
However, on the other hand, it can also restrict you from opportunities in other positions you might want to try. For instance, if you follow the route that I took and fully immerse yourself into wedding filmmaking you may find it more difficult to get work on film sets that require you to be available for months at a time.
You will need to figure out for yourself if the trade-off of dedicating yourself to a specialised facet of filmmaking will prevent you from other opportunities later on.
For me, I have definitely found this to be true. Working primarily as a wedding filmmaker for the past six years has been really fun and very rewarding but it has definitely caused me to lose out on some inspiring opportunities. Weddings are incredibly seasonal and are usually at weekends, stopping me from getting jobs for sports coverage or short films where they film on a Saturday and Sunday.
Working weddings means I wear many hats, often all at the same time. I’m a camera operator, audio technician, lighting and set designer, not to mention all the organisation I need to do too to make sure the shoot happens smoothly, and of course there’s all the editing, colouring and sound design after the shoot. I have an excellent grasp on all of the different aspects that go into film and video production, but I am often just seen as ‘the wedding guy’ when applying for work outside of my niche.
All of this is to say that my choice of allowing myself to fall deep into a niche of only one small part of video production as a whole has almost anchored me to my specialisation. It stunted my growth for opportunities in other avenues of filmmaking despite my knowledge of how to pull off a successful project.
This year I have been actively trying to pick myself up and de-integrate myself so closely with weddings by attempting to create ad-spec work for social media. In some ways, I’m trying to rebrand myself as more of a ‘generalist’ within the industry as a whole.
Relearning and repurposing skills like blogging, marketing and SEO to allow me to take fewer weddings, film more of the work I want, and even allow me to pursue some passion projects I had left on a hard drive gathering dust is a very exciting prospect. It sounds like basic stuff, but for me, it’s like a breath of fresh air.
So what exactly am I hoping to achieve by reinventing my skills and my career? Well by beginning this journey as something of a ‘jack of all trades’ I hope to discover a place where I am able to truly enjoy the creative freedom to shoot what I want when I want to. And I think that you should be doing the same. Whether you’re fresh out of studying an arts degree or have been working in the film and TV industry as a freelancer for a while now, I think there has never been a more important time than now to begin diversifying your skillset.
If nothing else, 2020 has been a perfect example of how critical it is to be multi-skilled in more than one area. Governments across the world have implemented lockdowns of varying degrees that have affected different sectors in different ways.
Looking purely at the photography and film industries the number of people who can be on a set at any one time has been significantly reduced, and while it won’t be forever it will stay that way for the foreseeable future. A lighting technician is far more likely to be brought on set if they also have experience as a sound recordist for instance.
Beyond this though it is also important to generalise your skillset for your own creativity and enjoyment. Learning new skills and being able to practice them in real-world scenarios is fun. Gaining the knowledge to do something broadens your horizons and enlarges the pool of experience you have to draw on for future projects.
It may seem counterproductive to any purist filmmaking sensibilities you might have, but learning entrepreneurial skills is likely the best path you can set yourself on. Knowing how to market your work and how to seize the opportunities laid in front of you is going to be the true key to your long term success, not only monetarily but also for your own creativity.
Being able to supplement your income from traditional film and video jobs with that from a business opportunity you took will give you more free time to truly work on what makes your heart sing. And who wouldn’t want to work on their passion projects 24/7?
While it may not be the right path for everyone, I truly do believe that now is the best time for those of us currently in the industry, and those about to enter it, to embrace and adopt the ‘jack of all trades’ lifestyle.
Repurpose the skills you already have and enjoy the process of diversifying what you thought was previously possible. Very soon setting aside dedicated time every week to make yourself more versatile to work on a set or as a freelancer will become the new normal.
The landscape of the creative industries may be changing but we live in an age where it is possible to learn so much in such a short period of time. Embrace the changes that are coming our way and ride the wave of innovation to design the perfect balance between your professional and personal works.

Best Cameras For Beginner Photographers And Videographers
Get ready to take your first steps into the world of photography and filmmaking with these incredible beginner friendly cameras!
Get ready to take your first steps into the world of photography and filmmaking with these incredible beginner friendly cameras!
If you’re in a rush then just take a look at the pros and cons directly below! If you want a more detailed breakdown of what each camera can do then just scroll on a little further!
best cameras for beginners in 2021:

Canon 250D
Pros -
Lightweight, Affordable, Easy to learn with
Cons -
More bulky and heavy than new mirrorless systems

Nikon d3500
Pros -
Very compact DSLR, great battery life, easy to learn with
Cons -
Small viewfinder can take a while to get adjusted to

sony a6000
Pros -
Lightning fast autofocus, very compact, crisp images, highly customisable
Cons -
No touchscreen control, mediocre kit lens, steep learning curve

Canon EOS m50
Pros -
Great electronic viewfinder, easy menu system, fast autofocus, fantastic images
Cons -
4K video heavily cropped, slow autofocus while filming in 4K, battery life could be better

Fujifilm x-t200
Pros -
Amazing look and feel to camera, large touchscreen for easy use, great looking images
Cons -
Generally more expensive than other systems, no image stabilisation, autofocus could be better
Finding the perfect camera to take your first steps with on your adventure into the vast realm of photography and videography can be really overwhelming at first. There are so many different brands, price ranges and terms you have to get to grips with at once that telling the difference between them all can seem pretty much impossible!
The real trick to choosing a camera that works best for you really depends on several factors that you won’t figure out until you are much more experienced as a photographer and filmmaker.
You don’t want to be fooled by all of the camera manufacturer’s technical jargon when making your decision on your first camera. Things like sensor sizes, the number of megapixels and the ability to record in 4k video aren’t necessarily things that will automatically make your camera ‘better’ than other models.
And on that same train of thought, just because something is ‘cheaper’ doesn’t always mean that you’re getting a good deal for the money you’re spending. If you end up outgrowing the capabilities of the camera and need to buy a new one then you will be spending extra money on the camera you probably should have bought in the first place.
So to help you navigate the minefield that is buying your first camera here are the top criteria I think you should be looking for as a beginner photographer in order of importance:
Price
Simplicity of controls
Dedicated manual mode
Range of lenses
The ability of the camera to grow alongside you
If you’re able to find a camera that ticks all of these criteria then you will know you’ve found the perfect camera for you!
Obviously the number one thing to take note of is the price of the camera versus the budget you have set aside for yourself. I would never ever suggest picking up a camera over £1000 for a total novice. You will be so overwhelmed by all of the options that you will probably never take the time to learn how it works. Like every new skill, start small and work your way up!
I personally started making films with a cheap £60 pocket camera which I used for two years before I bought my first ever DSLR, a Canon 550D. I then used that camera for close to five years before I upgraded again. You will discover for yourself when is the right time to upgrade your camera, but for now the best thing to do is just to enjoy the journey of learning all about your new camera.
All of the cameras I’ve listed below are around the same price range as my first DSLR when I got it and are cameras I would highly consider using now if I were to begin my photography and filmmaking journey again!
Best Cameras For Beginners
1 - Canon 250D
This is one of Canon’s cheapest DSLR offerings, but don’t let its price fool you! This camera has a lot of neat features packed into it that will make using and learning with it an absolute breeze. From a photography standpoint the autofocus of Canon cameras is virtually second to none and with the camera’s built-in on screen assistant you will learn very quickly what the camera can do.
The camera will be great at guiding you through everything until you’re ready to try your hand at using the camera in a fully manual setting. Think of it like taking the training wheels off your bicycle as a kid!
This camera was built for simplicity and that’s exactly what you’ll get!
From a technical standpoint the 250D has Canon’s best APS-C sensor, meaning your images will be nice and sharp, have good colours and it will perform slightly better in low light than older models. It also boasts being able to film in 4K if you want to try your hand at videography. You just need to make sure your PC can edit that footage first!
Best Beginner Canon DSLR
Canon 250D
2 - Nikon d3500
Looking through Nikon’s entry-level camera line this camera really leapt off the page at me. It has a lot of very similar features as I mentioned in the previous camera, like the in-camera guided assistant to help you learn what everything in your new camera does, super-fast autofocusing and a fantastic APS-C sensor to boot!
Nikon has made the layout of buttons on the camera very straightforward to understand, and it appears as if their fully automatic photo modes are very good at deciding what you are trying to photograph and will adjust their settings to capture it perfectly.
Cameras like this are perfect for beginners and students as it gives you a great grounding in the techniques you need to use to be able to take great photos yourself.
With that said, I do feel like it would be easy to outgrow this camera quite quickly if you are serious about taking photography and filmmaking from just a hobby to something more serious. Looking at the cost of Nikon’s lens lineup though I feel like this camera ticks all the boxes for anyone who is hoping to have something that is higher quality than just from their phone without going too in-depth into learning photography.
Best beginner Nikon dslr
Nikon D3500
3 - Sony a6000
These days Sony cameras are my go-to for both professional work and for personal projects so it makes it very easy for me to recommend this small powerhouse.
The a6000 is the first mirrorless camera in this list, meaning the lens looks directly onto the sensor that captures the image without the need for the mechanical mirror system in a DSLR. As a result, this camera is unbelievably light and tiny!
It outperforms both the Canon 250D and Nikon D3500 by a longshot in terms of technical specifications and there’s a great deal of customization you can do to have the camera shooting and feeling how you want it to. On the flip side of this though, there will be a much steeper learning curve in using this camera. The menus can feel cluttered and confusing and there aren’t built-in assistants to help you. On the bright side, there are plenty of Youtube tutorials to fill that gap in your knowledge!
One of the benefits of shooting with any mirrorless camera like this one is the fact that they all use a live electronic viewfinder rather than a traditional one. This means you can play around with your exposure settings and see exactly how your photo will turn out before you even take it.
I would highly recommend this camera to anyone who is serious about learning photography and filmmaking, as despite the learning curve this camera will stay with you for a long time before you feel like you need to upgrade.
best sony mirrorless for beginners
Sony a6000
4 - Canon EOS m50
If you were looking for a mirrorless Canon camera that mixed the capabilities of the previously mentioned 250D and Sony a6000 then this camera might be right up your alley!
The Canon EOS M50 combines the simplicity of functionality that Canon is known for in its entry-level cameras while still giving plenty of flexibility for you and your camera to grow alongside each other.
Being a mirrorless camera the M50 also benefits from having an electronic viewfinder that allows you to see how your photo looks before you take it, while still retaining the colour and autofocus that Canon is known for.
While you no longer have a built-in guide you can still find out the information you need online. That is if you haven’t begun to instinctively learn how to use the camera.
This camera is honestly a serious contender for my pick if I were to begin learning photography from scratch again. The video capabilities of the M50, however, leave a little to be desired, not because they’re bad, but because of a very strange limitation to filming in 4K where there is a very heavy crop on the image that isn’t there while filming in 1080p.
Either way, this camera is absolutely fantastic to learn with while still giving you plenty of time to grow into its capabilities.
best canon mirrorless for beginners
Canon EOS M50
5 - Fujifilm x-t200
How a camera looks really shouldn’t be important in choosing your first camera, but I’m going to be perfectly honest and say that the Fujifilm X-T200 is the coolest looking camera on this list.
It looks like the retro film cameras from a bygone age but with enough of a modern flair that it's the kind of camera that will actually make you feel like a photographer.
Just like the previous two, this camera is also mirrorless and will give you all of the benefits that come with it.
The X-T200 differs from the previous two cameras in how it approaches its layout, however. Choosing instead to have fewer buttons on the back of the camera to allow for a larger, flip-out touch screen. The buttons you would have had on the back are now either operated by the touch screen or by using the dials on the top of the camera.
While it could take some getting used to, these dials add a more photographer-like feeling when using the camera.
Additionally, the camera has autofocus that is on par with the Canon M50 and Sony a6000, so the gap really is closing in on which of these three would best suit your needs.
From a video perspective, this camera competes with the a6000 with its 4K filming and leaves the M50 behind in the dust. So it really does depend on what you plan on using the most with your camera.
As the most expensive camera on this list I would definitely recommend the Fujifilm X-T200 only to those who are already 100% certain they will be putting in the time and effort to learn how the camera works. I would say it has great potential to help those just starting out and learning the basics with its automatic modes and has incredible flexibility for when you are ready to start learning to use it manually.
best fujifilm mirroless for beginners
Fujifilm X-T200
ABout Sam

Sam is an experienced filmmaker, photographer, and editor with over 6 years experience working professionally in the media and creative industries.